Home > Edge Control Spreadsheet
The Edge Control spreadsheet allows you to control the road cross-section in detail, with the following items:
Compulsory edges and components
Cut/Fill edges and components
Median edges and components
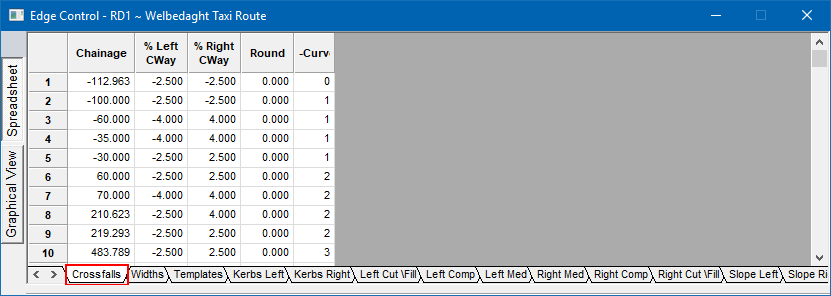
The Crossfalls tab controls the normal crossfall of the road, as well as the superelevation.
The start and end detail of all change of state points must be included. The routine will apply constant crossfalls between two identical entries, and work out a lineal progression of change between two successive entries that differ. Use Review Control to get a clearer understanding of your spreadsheet data.
|
Option
|
Description |
|
Chainage |
Enter the chainage of the crossfall change point. |
|
% Left CWay |
Enter the crossfall for the left carriageway, a positive value implies an uphill crossfall from the centreline. |
|
% Right CWay |
Enter the crossfall for the right carriageway, a positive value implies an uphill crossfall from the centreline. |
|
Round |
Enter the length of parabolic curve that will be applied to the elevations along the road edges, where one grade changes to another. The round value that should be entered, is the length of parabolic curve that will be applied to the elevations along the road edges where one grade changes to another. This provides smooth transitions to superelevation into and out of curves. |
|
H-Curve |
This value refers to a horizontal curve which can be associated with this crossfall entry. The program will automatically enter the correct values. |
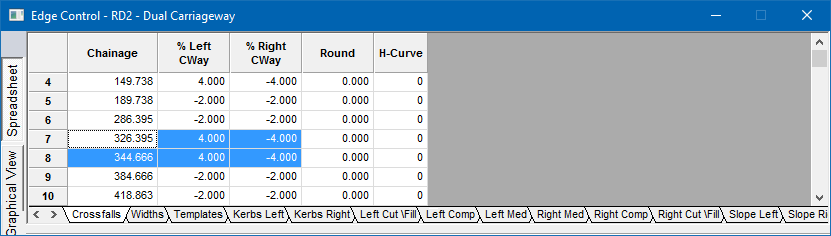
The edge control input is exactly the same as a standard non-crowned road. There is still only one horizontal alignment for dual carriageways, and the super elevation is also specified by one value for the left and one value for the right hand side. For crowned dual carriageways, this means that the left super value in the edge control is applied to both carriageways – left of the two crowns.
Consider the following example with the following inputs:
Chainage 200 - Left super = -2%; Right super = -2%.


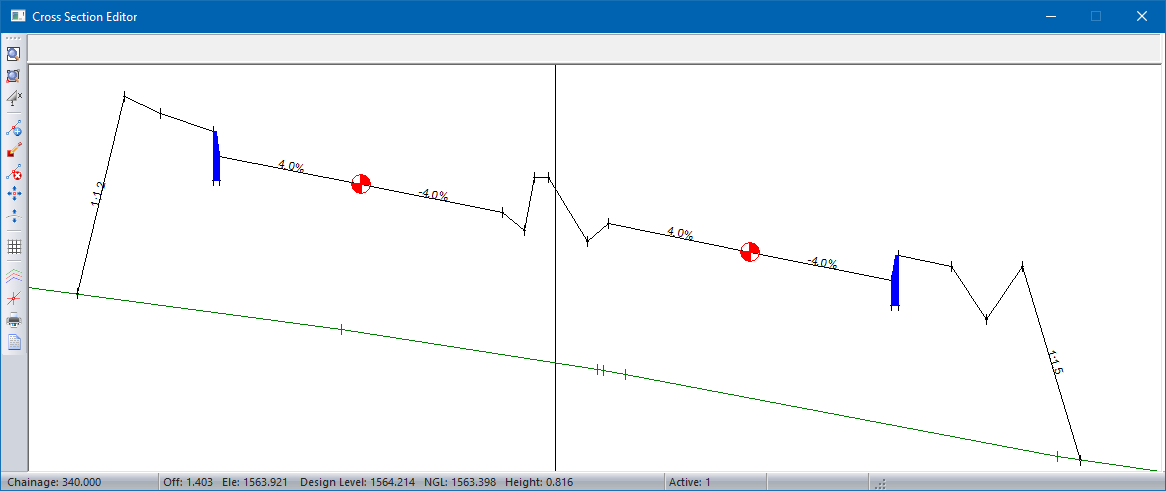
Consider another example with the following inputs:
Chainage 340 - Left Super = +4%; Right Super = -4%.
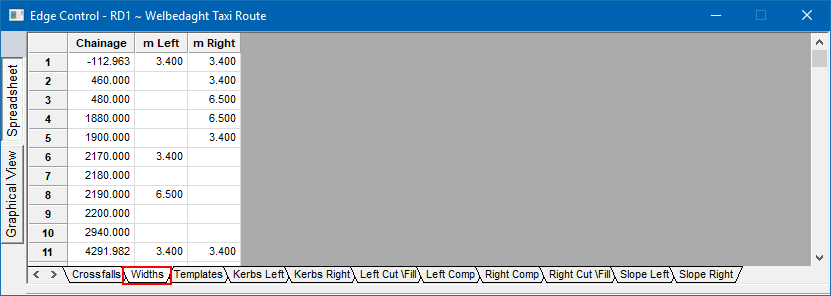
The Widths tab controls the width of the carriageway(s).
The start and end detail of all change of state points must be included. This function applies constant widths between two identical entries, and works out a lineal progression of change between two successive entries that differ. Use Review Control to get a clearer understanding of your spreadsheet data.
|
Option
|
Description |
|
Chainage |
Enter the chainage of the width change. |
|
m Left |
Enter the width of the left carriageway. |
|
m Right |
Enter the width of the right carriageway. |
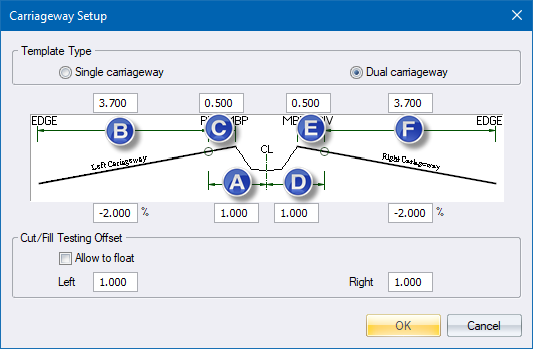
The Widths tab for a dual carriageway road controls the carriageway widths by means of the following settings.

|
Label |
Option
|
Description |
|
|
Chainage |
Enter the chainage of the width change. |
|
A |
m Left CL-Pivot |
Enter the distance from the centre line to the left pivot point. |
|
B |
m Left Pivot-SBP |
Enter the distance from the left pivot point to the left shoulder break point. |
|
C |
m Left Pivot-MBP |
Enter the distance from the left pivot point to the left median break point. |
|
D |
m Right CL-Pivot |
Enter the distance from the centre line to the right pivot point. |
|
E |
m Right Pivot-MBP |
Enter the distance from the right pivot point to the right median break point. |
|
F |
m Right Pivot-SBP |
Enter the distance from the right pivot point to the right shoulder break point. |
 If any of the values in the spreadsheet (except Chainage) are left blank, they will automatically be linearly interpolated using the nearest valid data. This means that you only have to enter data where the lane width or pivot point actually changes.

If you try to enter negative values for the Pivot Median columns, you will get the following error message when you save the spreadsheet.
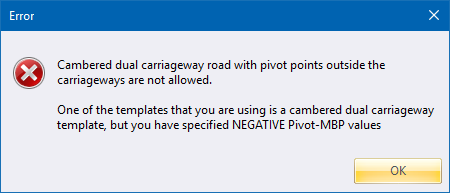
Click OK to close the dialog and return to the Edge Control dialog where the negative values will be selected.
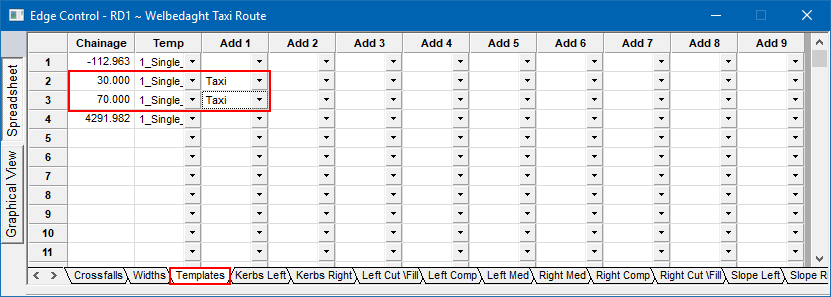
The Templates tab allows you to vary the template over the length of the road. It also allows you to add an additional template to the outer edges of the road profile. When running Apply Template, the templates specified in the Temp column of the Templates page will be Applied while the templates in the subsequent columns (Add1, Add2) will be Added. The only compulsory entries in the templates page is the Chainage and Temp column.
In the example below, an additional Taxi template is applied from chainage 30 to just before chainage 70, after the toe point determined by the template.
If a template is to be applied later in the area calculation, the name to be used should be entered in the Template page. Note that the road width and crossfall details that are entered in the spreadsheet will override those that are contained in the template. The template number may be checked against its path and name by selecting Template Paths.
The only compulsory entries are the Chainage and Temp columns.
|
Option
|
Description |
|
Chainage |
Enter the chainage of the template change. |
|
Temp |
Select a template from the dropdown list to be applied to the edge levels when running Apply Template. Only templates specified in the Template Paths will be listed. |
|
Add1 to 9 |
Select a template from the dropdown list that will be added automatically when running Apply Template. The specified template will be added to the extremes of the template specified in the previous column. Only templates specified in the Template Paths will be listed. |
The kerbs tabs allow you to specify kerbs on the edges of the carriageway. You can specify different kerbs for negative and positive crossfall slopes in the (-super) and (+super) columns.
The specified kerb will be applied from the chainage where it is first listed, to the next chainage. In the example below, a Figure 9 kerb will be applied on the left from chainage 1740 to the chainage just before chainage 2205. At chainage 2205 the Figure 8a kerb will be applied.
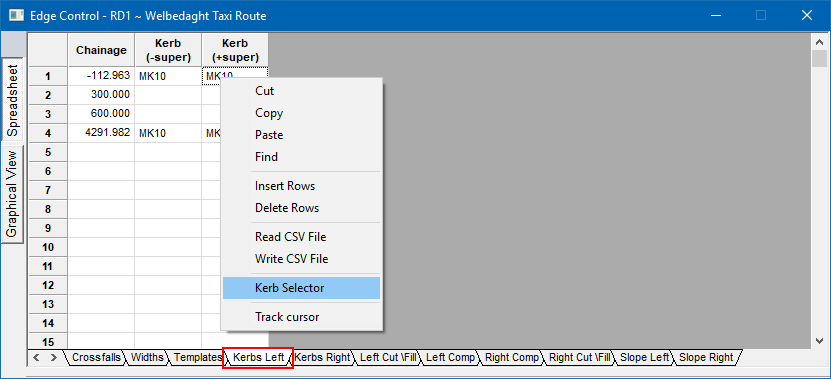
To select a kerb, simply right-click and select the Kerb Selector option from the popup menu.
|
Option
|
Description |
|
Chainage |
Enter the chainage of the template change. |
|
Kerb (-Super) |
Enter the kerb to be used at this chainage where the crossfall is less than zero (negative). |
|
Kerb (+Super) |
Enter the kerb to be used at this chainage where the crossfall is greater than zero (positive). |
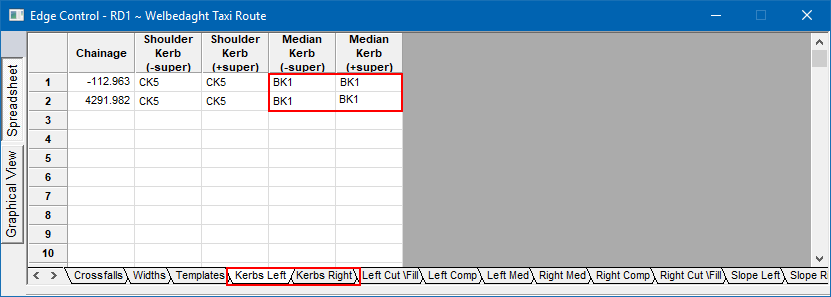
To specify a kerb, right-click on Kerb cells and select the Kerb Selector option from the popup menu.
|
Option
|
Description |
|
Chainage |
Enter the chainage of the template change. |
|
Shoulder Kerb (-Super) |
Enter the shoulder kerb to be used at this chainage, where the crossfall is less than zero. |
|
Shoulder Kerb (+Super) |
Enter the shoulder kerb to be used at this chainage, where the crossfall is greater than zero. |
|
Median Kerb (-Super) |
Enter the median kerb to be used at this chainage, where the crossfall is less than zero. |
|
Median Kerb (+Super) |
Enter the median kerb to be used at this chainage, where the crossfall is less than zero. |
The compulsory additions on the left and right will be displayed here.
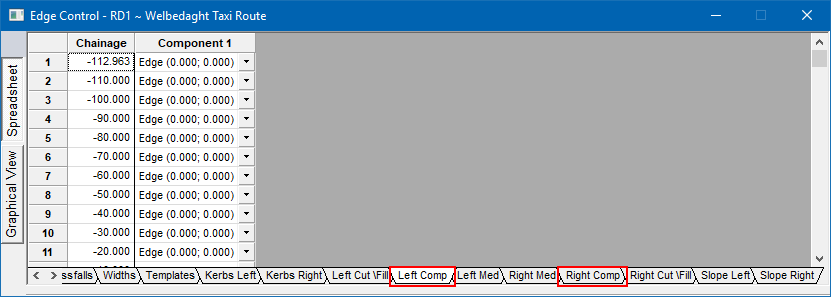
Right-click menu options are available.
The cut/fill components will be displayed here, ordered from the left of the road towards the right.
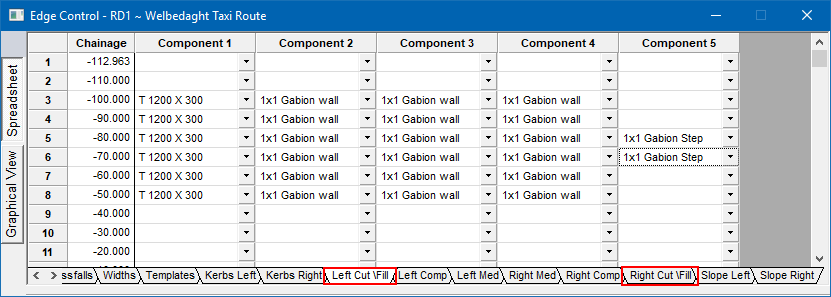
Right-click menu options are available.
Displays the edges/components in the left and right median portions for a dual carriageway road.
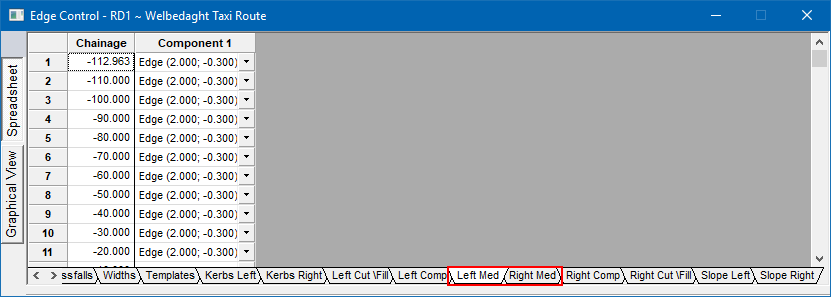
Right-click menu options are available.
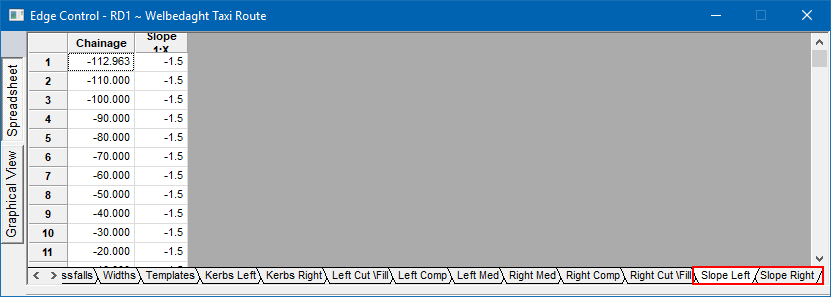
The cut/fill slopes of the cross-sections will be displayed here.
The following right-click menu options are available on the Left Cut/Fill, Left Comp, Left Med, Right Med, Right Comp and Right Cut/Fill tabs.
|
Option
|
Description |
|
Select range on plan |
Allows you to select a range of chainages on plan to add a component. You can also use the normal spreadsheet drag-select option to select a range of cells. |
|
Edit Component |
Allows you to change the component for the selected cells using the Edit Component options. |
|
Replace Component |
Allows you to only replace certain components in the selection using the Replace Component options. |
|
Append Component |
Appends a new component column to the end of the selected chainage range. |
|
Insert Component |
Inserts a new component column to the selected chainage range to the left of the highlighted position. Components from the highlighted position will be shifted to the right. |
|
Delete Component |
Deletes the selected components. |
|
Component Selector |
Displays the Component Selector with a list of all the available components in the library. |
See Also Edge Levels