Home > Roads Mode > Alignment > Horizontal > Edit Alignment
Edit a horizontal alignment.
|
Icon |
Command |
Shortcut Key |
Toolbar |
|
|
RD_HORIZONTALEDIT |
|
|
This function allows you to enter a new horizontal alignment, or edit an existing alignment.
The horizontal alignment is specified using horizontal points of intersection (HPIs). You can specify the curve radius at the HPI, the transition lengths entering and exiting the curve, and the offset.
Procedure
The horizontal alignment is stored in ASCII format in the design file of the active road file, and can be entered with the spreadsheet in this function or a text editor.

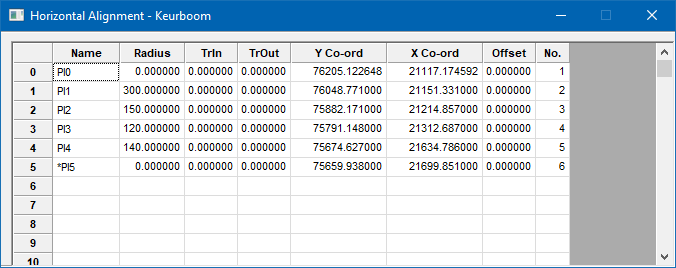
The alignment requires that the names of the start point, the horizontal P's, and the end point be entered. The radius of the horizontal curve at each PI must also be entered. A radius of 0 is calculated as a kink.
 In the example above, the value of 3.7 entered in the Radius column for the first PI (PI0) is not seen as a radius, but is rather the start chainage of the alignment.
The horizontal curves can also have transition curves into and/or out of each curve specified. The TrIn and TrOut columns are used to specify the length of the transition curve, which is calculated as an Euler spiral. Transition lengths are usually equal on either side of the circular portion, but there is no need to conform to this.
In order to correctly orient the alignment, you need to enter the coordinates of the start point, PIs and end point. If 0 is entered for both coordinate values, the current terrain file is searched for a point of the same name and, if found, its coordinates are entered automatically. If such a point is not found, you are asked for the correct coordinates.
You can enter an optional offset from the actual centre line for each point. This is normally used in cases where the alignment points are not along the centre line of the road, but rather at some other point such as the left or right kerb line. Offsets to the left of the alignment are entered as negative numbers, and those to the right as positive numbers. When the alignment is stored or calculated in any way, these offsets are used to determine the correct position of the points along the centre line.
Finally, you can enter a curve number. The program automatically enter these values. However, if you want your curves to be numbered from a specific number then you can simply enter this number in the [No] cell of the start PI row.
Close the spreadsheet to save the data.

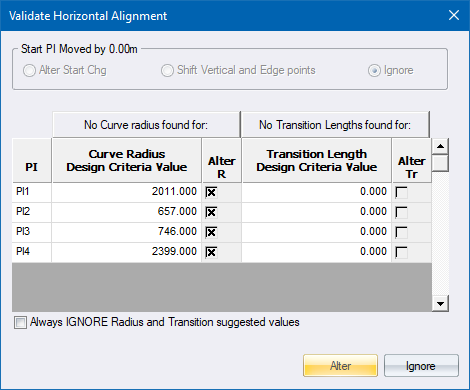
Click Alter to update the horizontal alignment spreadsheet with the selected values.

Click Yes to save the changes to the *.des file; or click No to discard the latest changes. If you click No, no VPI and edge control point shifting is done.


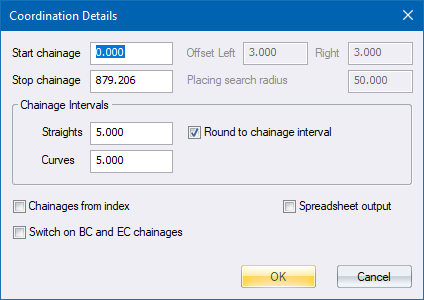
Specify the chainage intervals and click OK.

If the circular radius of a particular horizontal curve is less than the value specified in the "Max Tr. Len" column in the Design Criteria, a transition curve is calculated. The transition curve lengths for these curves are calculated by the formula selected in the Design Criteria.
According to the TRH, transition curves should be introduced where a superelevation rate of more than 6% must be used at a circular curve. The procedure that should be followed is to consult the Superelevation graph and enter the curve radii for 6% into the Max Tr. Len column on the Design Criteria. If a transition curve is needed, its length must be equal to the length required for the development of superelevation. i.e.
The transition length is calculated using the UK formula: Lt = V3 / (46.7 * q * R)