Icon
Command
Shortcut Key
Toolbar
![]()
LAYERSETTINGS
Main, Settings
Home > CAD Mode > Settings > Layer Settings
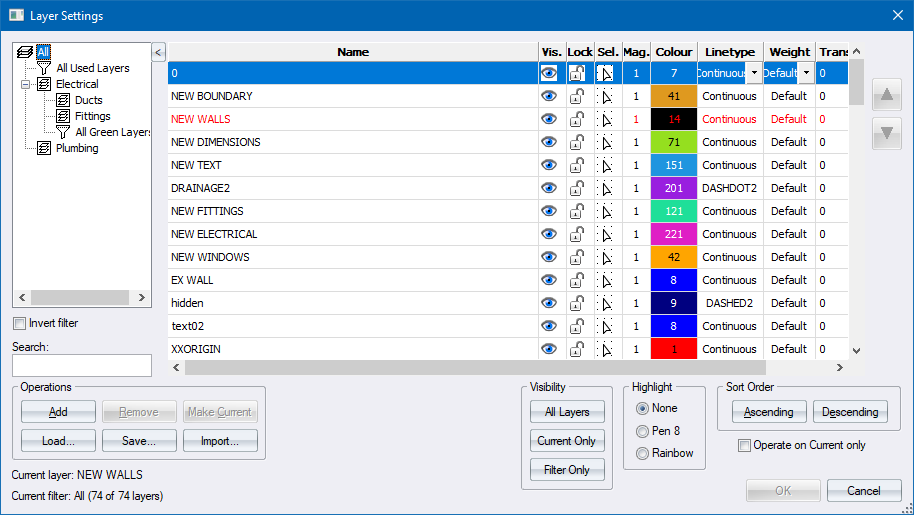
Create and manage the layers in the drawing.
|
Icon |
Command |
Shortcut Key |
Toolbar |
|
|
LAYERSETTINGS |
|
Main, Settings |
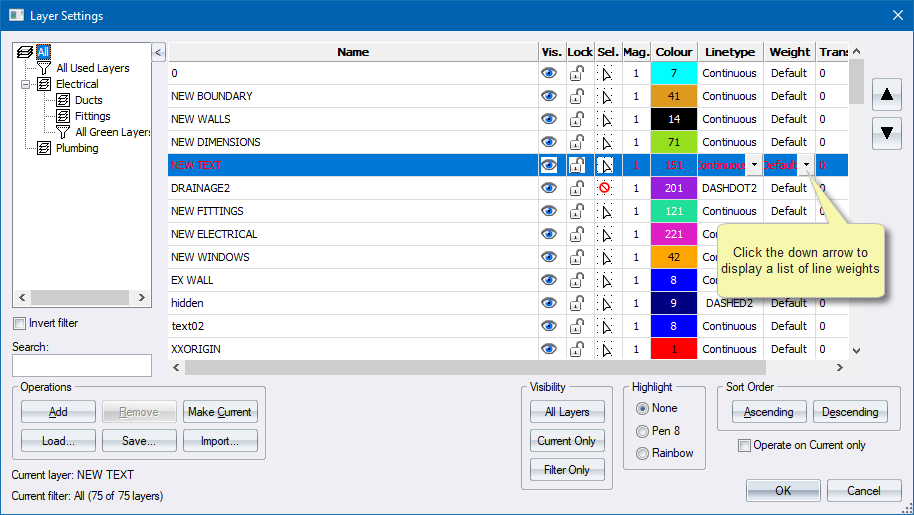
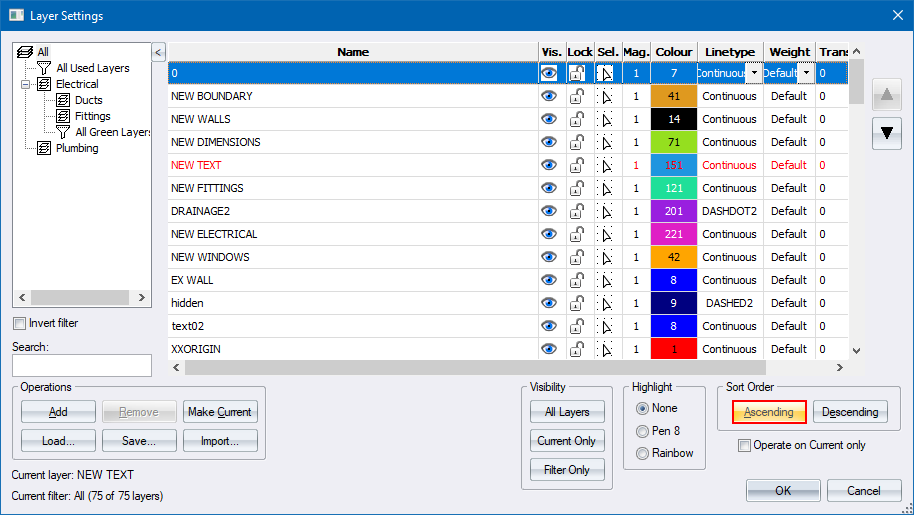
This function allows you to set up or manage the layers in a drawing using the Layer Settings. You can also sort the layers by name, in ascending or descending order.
You can also group layers into Layer Groups to display a subset of layers in the layer grid. For example, you could create a group than contains all the layers that hold the electrical layout in the drawing.
You can create Layer Filters to filter which layers are displayed in the layer grid, based on the properties of the individual layers
Take note of the following:
Layer 0 cannot be deleted and will always appear at the top of the layer list.
Removing a layer will delete all entities on that layer.
Changes to the layer settings only take affect after you click OK.
The following operations can be performed on the drawing layers:
 To select multiple layers, press [Shift] to select all layers between first and last click; or press [Ctrl] to select individual layers.
Procedure
The Layer Settings display.
To add a new layer:
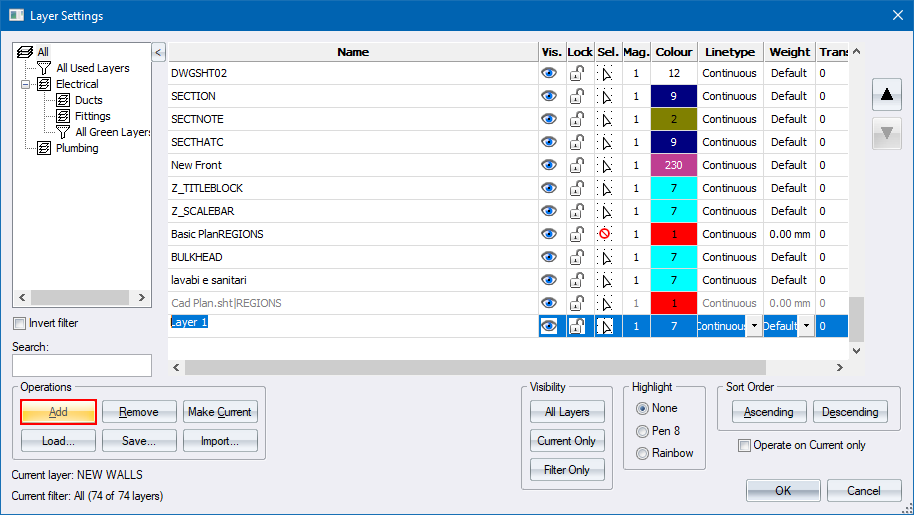
Type a unique name for the new layer and press [Enter].
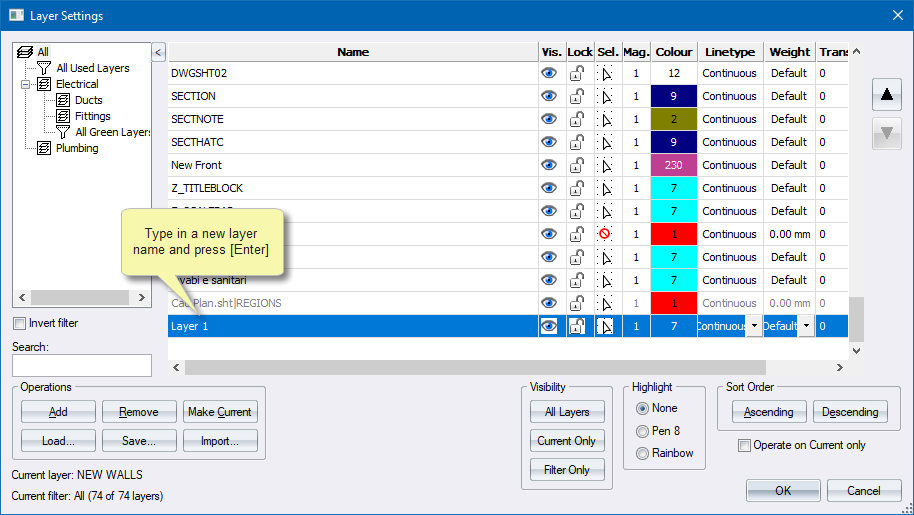
The new layer is only added to the drawing when you click OK. If you click Cancel, the new layer is discarded.
To remove a layer:
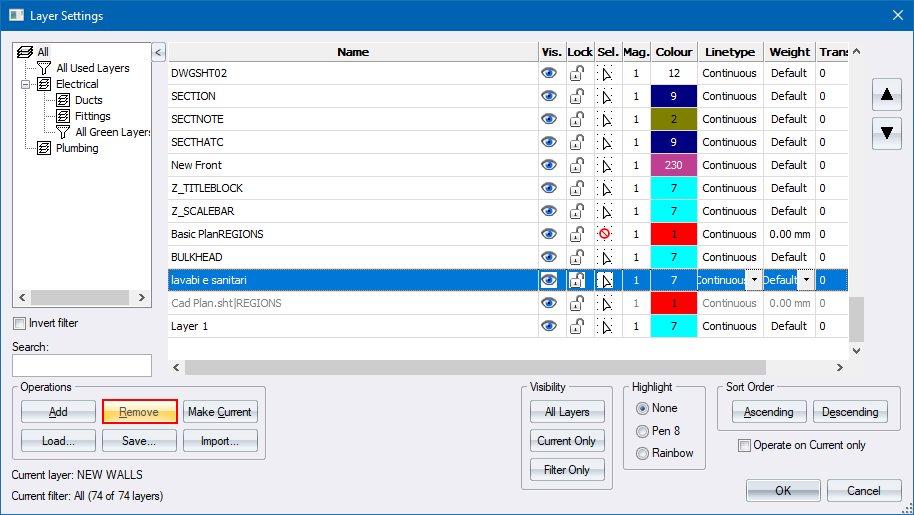
Click Remove.
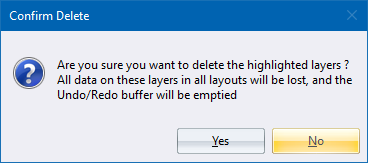
The layer, and all the entities on it, are only deleted when you click OK. If you click Cancel, the layer is not deleted.
To set the current layer:
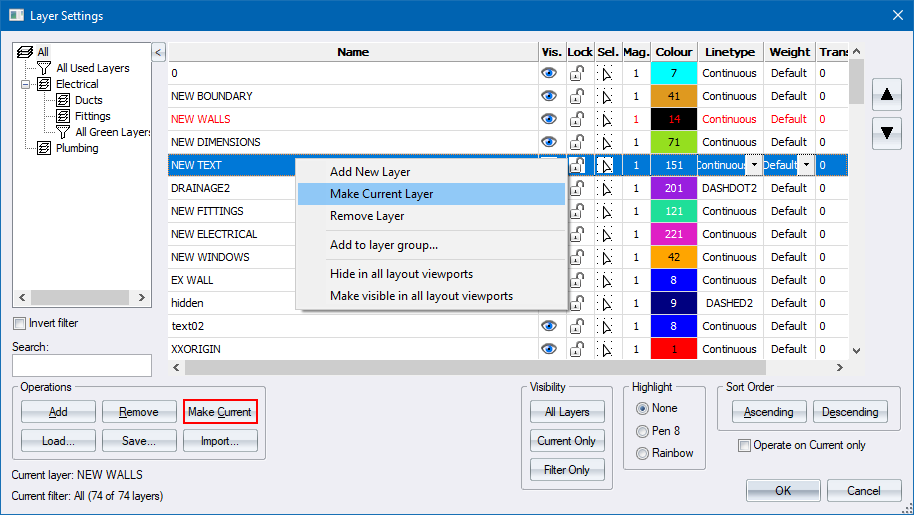
The layer only actually becomes the current layer when you click OK. If you click Cancel, the changes are discarded.
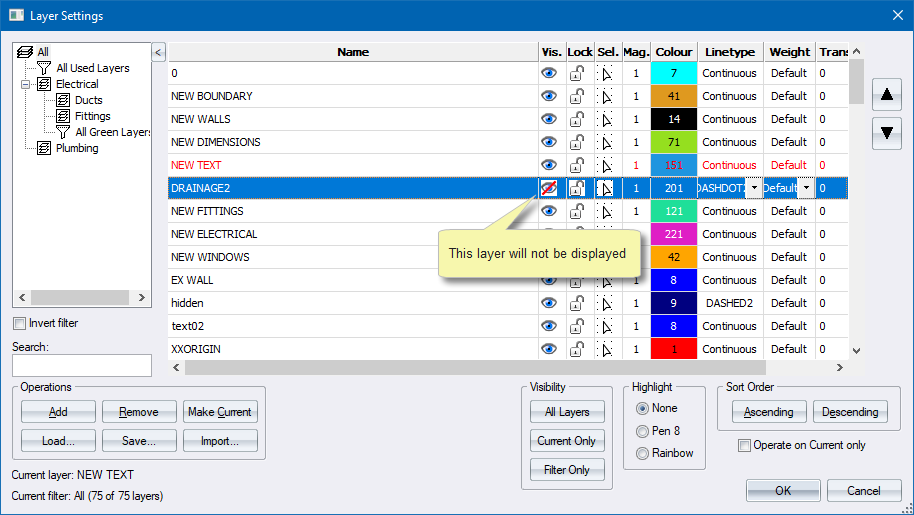
The properties of a layer are arranged to the right of the layer name, in the same row of the layers list. The visibility, lock, select, magnification, colour, line style and line weight can all be edited.
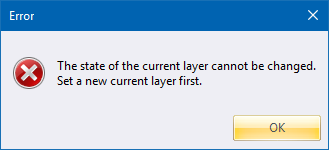
The visibility of the current layer cannot be edited. The following message displays if you try to switch off the visibility of the current layer.
To edit the visibility:
![]() - Entities in the layer are displayed.
- Entities in the layer are displayed.
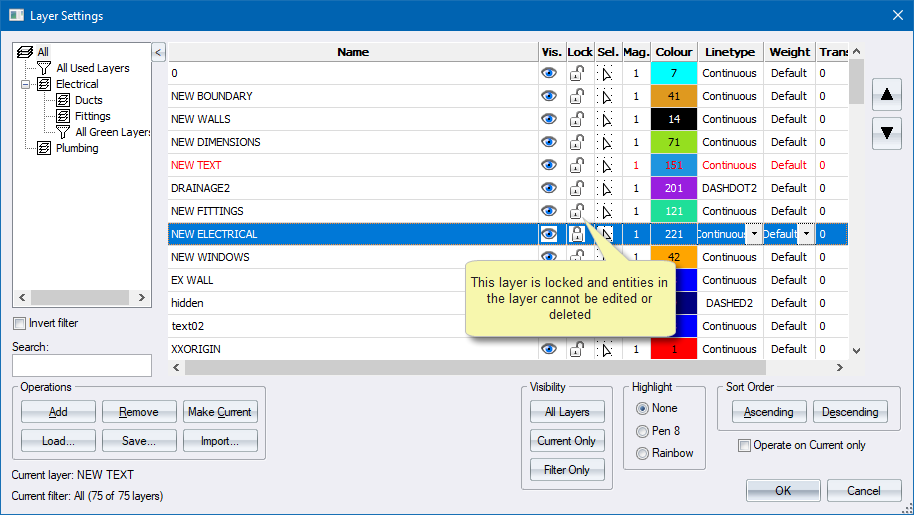
Click the Lock icon to lock or unlock the layer. The padlock is closed when the layer is locked.
![]() - Layer is unlocked and entities in the layer can be changed.
- Layer is unlocked and entities in the layer can be changed.
Click the Select icon to make entities on the layer selectable or unselectable.
![]() - Entities in the layer can be selected.
- Entities in the layer can be selected.
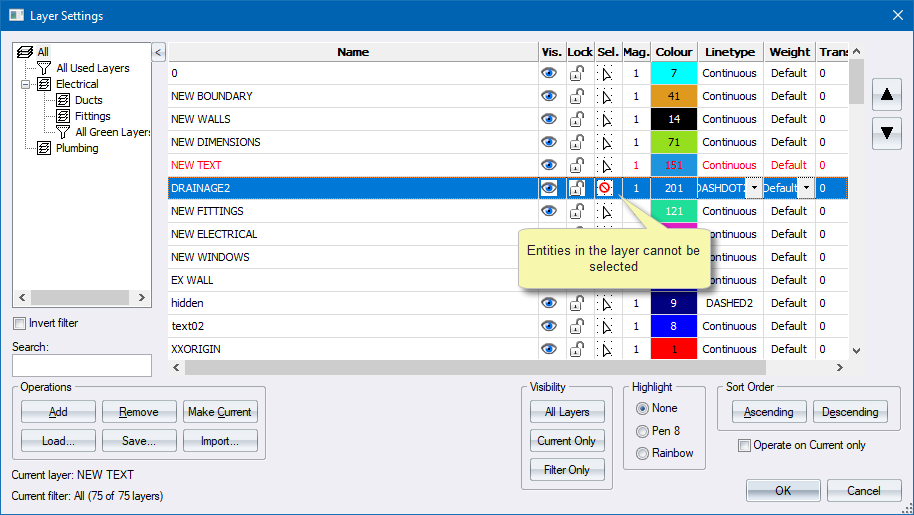
When this option is on, entities on the layer cannot be selected.
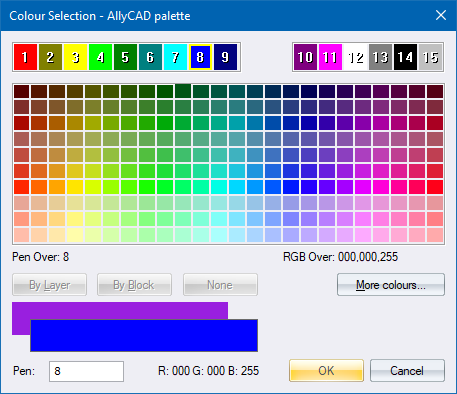
The layer colour setting is only applied to entities with a ByLayer colour setting.
Right-click the Colour cell to select a pen colour for the layer.
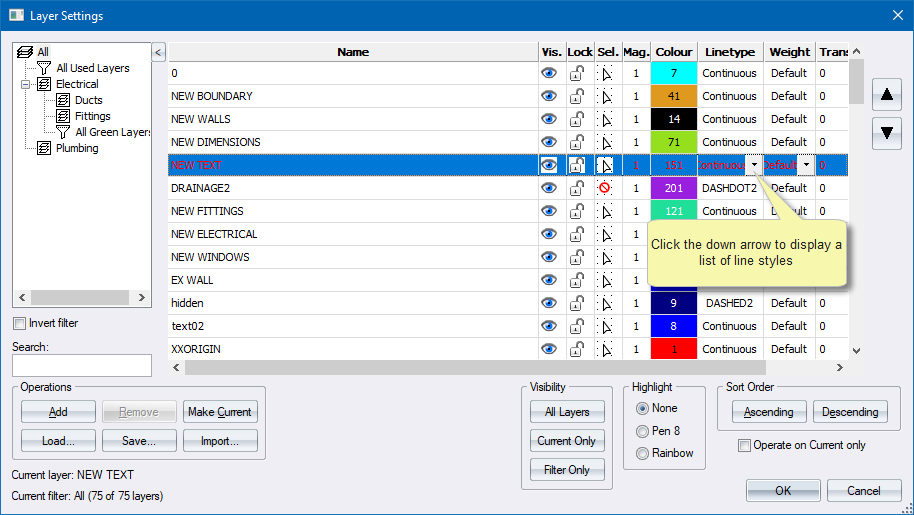
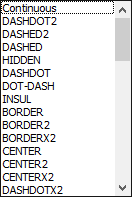
The layer line style setting is only applied to entities with a ByLayer line style.
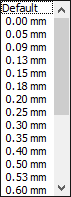
The layer line weight setting is only applied to entities with a ByLayer line weight setting.
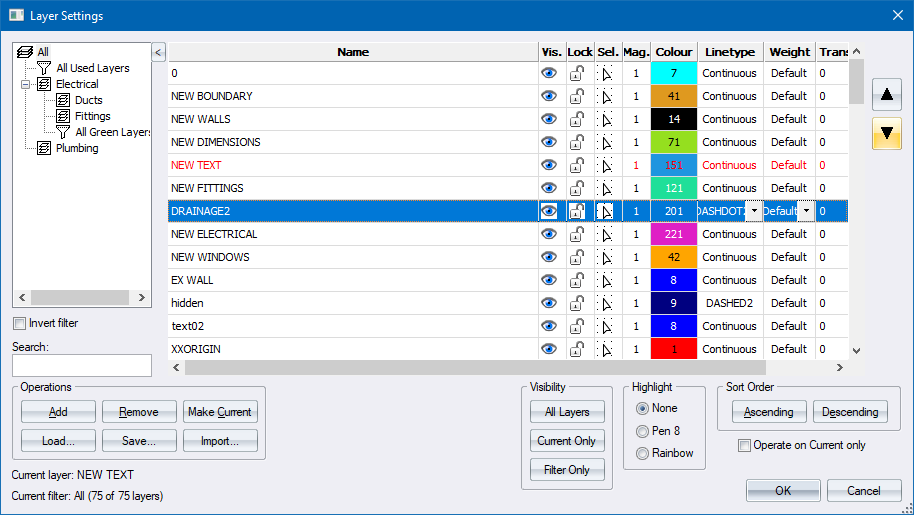
To change the position of a layer in the layer list:
Select the layer to move up or down.
If you click Cancel to exit the Layer Settings, the new sort order is lost.
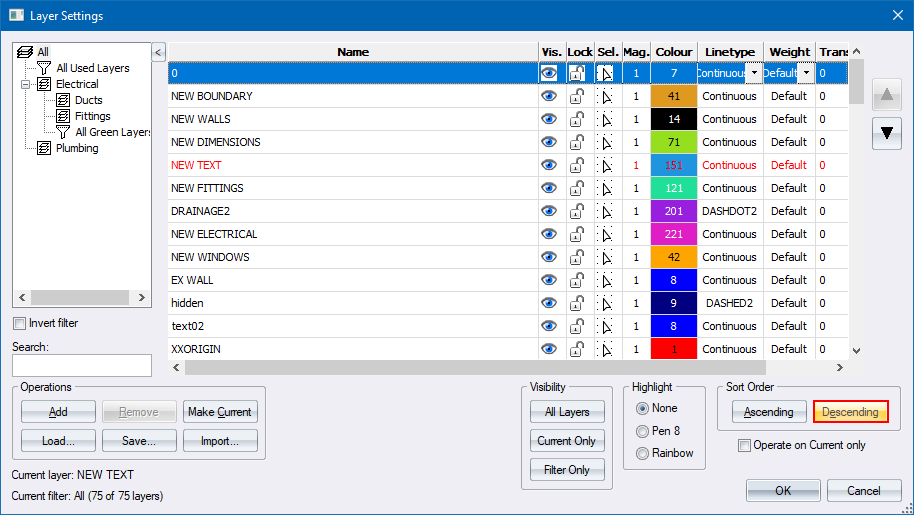
If you click Cancel to exit the Layer Settings, the new sort order is lost.
Click OK to close the Layer Settings and implement the changes.
To save the layers you have created so they can be loaded and used in another drawing:

The Save Layer Settings options display.
Type in the filename and click Save. The file extension for a layers file is (.ly4).
An information message lets you know the layer settings have been saved.
To load the layers you have saved:
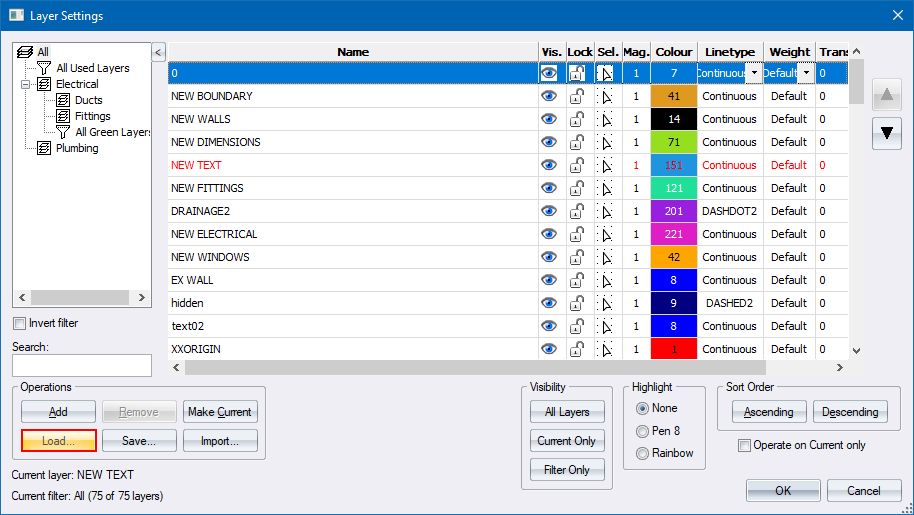
The Load Layer Settings display.
Click the layers file you want loaded into the current drawing.
Click Open.
The layers are added to the Layer Settings.
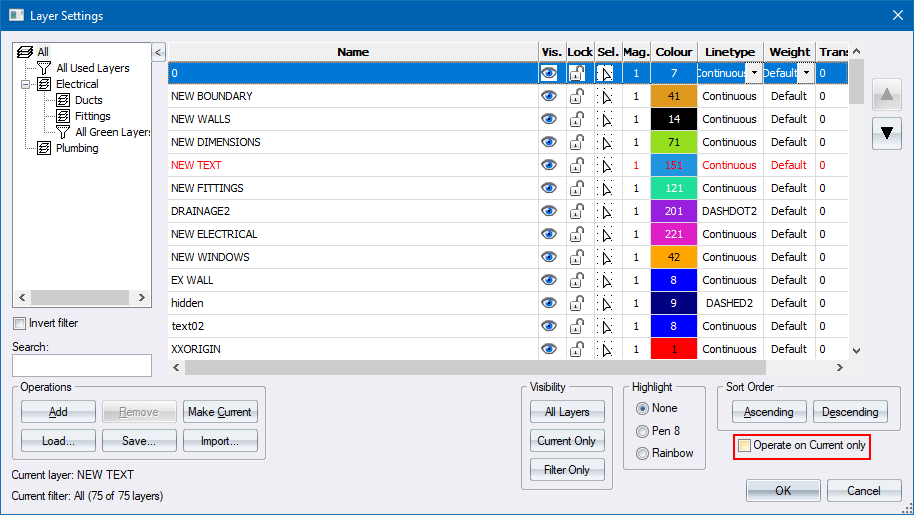
If the Operate on Current only checkbox is not selected, you can operate on all unlocked layers. By selecting the Operate on Current only checkbox, you can only work on the current layer.
The Filter pane on the left edge of the Layer Settings shows the layer groups and filters hierarchy.
|
Item |
Description
|
|
|
Layer group. |
|
|
Layer group with sub-groups. |
|
|
Layer filter. |
Layer groups and filters can be added or removed using the right-click context menu in the Filters pane.
The Filter pane can be folded away using the  button, which allows for a wider view of the layer list.
The Search input allows you to quickly find layers by displaying only those layers whose names start with the characters you type.
|
Item
|
Description
|
|
|
Click All in the filter tree to show all layers in the drawing. |
|
|
Click a layer group item in the filter tree to show only the layers which belong to that layer group. |
|
|
Click a layer property filter item in the filter tree to show only the layers which pass that layer property filter. |
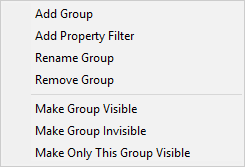
Right-click a layer group item to open the context menu.
|
Option
|
Description |
|
Add Group |
Add a layer group beneath the selected item. |
|
Add Property Filter |
Add a layer property filter beneath the selected item. |
|
Rename Group |
Rename the selected group. |
|
Remove Group |
Remove the selected group. |
|
Make Group Visible |
Make all layers in the group visible. |
|
Make Group Invisible |
Make all layers in the group invisible. |
|
Make Only This Group Visible |
Make only the layers in the group visible. All other layers in the drawing will be made invisible. |
|
Option
|
Description |
|
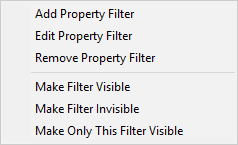
Add Property Filter |
Add a layer property filter. |
|
Edit Property Filter |
Edit the selected layer property filter. |
|
Remove Property Filter |
Remove the selected filter. |
|
Make Filter Visible |
Make all layers in the selected filter visible. |
|
Make Filter Invisible |
Make all layers in the selected filter invisible. |
|
Make Only This Filter Visible |
Make only the layers in the selected filter visible. All other layers in the drawing will be made invisible. |
Please note:
When adding a layer group, the selected layers in the layer list are added to the layer group.
Select the Invert filter checkbox to show all layers that fail the current filter, or that are not in the current group. This is reset when you select a different filter or group.
Use the Search field to show only layers with names matching the characters you type. The search is case-insensitive, and works on all the layers in the drawing i.e. it ignores the current group or filter.
Right-click on a layer filter item and then select Edit Property Filter from the context menu.
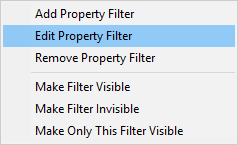
The Layer Filter options display.
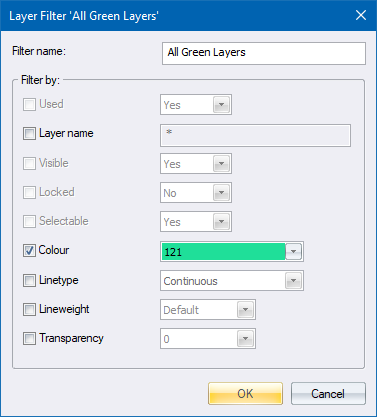
You can edit the name of the layer property filter.
You can enable which properties will be filtered using the checkboxes on the left side of the Layer Filter Options.
You can then set the property filter options for the enabled properties.
Click OK to save your changes to the filter.
In the example above, when the layer filter “All green layers” is selected, only layers which are selectable, and whose pen colour is 5 (green), are displayed in the layers list.
All layer groups and layer property filters inherit the layers from their “parent” group or filter node i.e. the layers listed for a specific group or filter are the result of all filters in the branch being applied from the root node. This means that a layer can only exist in a group or filter if it is already in the parent group/filter.


