Expand or shrink an existing cross-section.
|
Icon |
Command |
Shortcut Key |
Toolbar |
|
|
RD_SECEXPANDSHRINK |
|
|
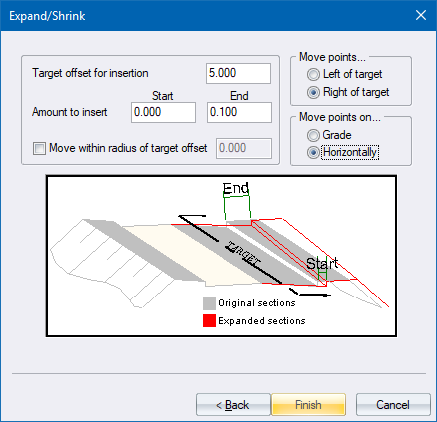
This function allows you to expand or shrink cross-sections by moving a whole set of points horizontally, left or right of a certain 'target' offset. The movement can be horizontal or 'on a grade'. It is typically used to widen carriageways, expand kerbs, allow for bus ranks, create bell mouths, transition in and out of dual carriageway splits, introduce drains, etc.
The function is only applicable to horizontal shifts. For vertical shifts, refer to the Absolute Change routine.
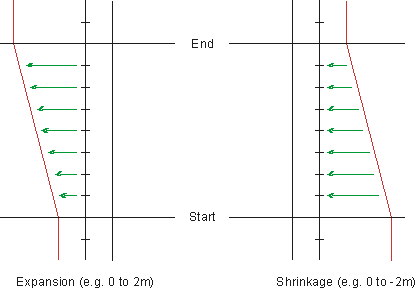
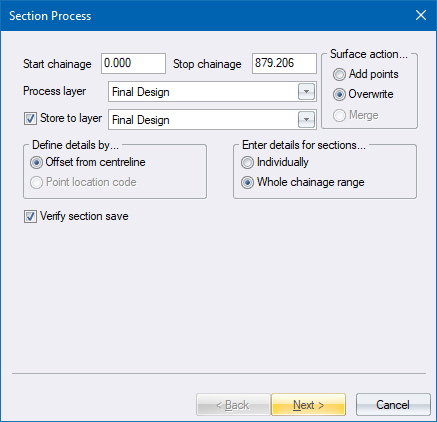
If the details are to be applied to the entire specified chainage range, you must enter the amount to insert at both the start and stop chainages. The actual value can either be an expansion (positive value) or shrinkage (negative value), or nothing. For each intervening section, the amount to insert is calculated by lineal interpolation between the start and stop chainages.
If details are to be applied individually, only the start insertion is available and each chainage may be individually set.
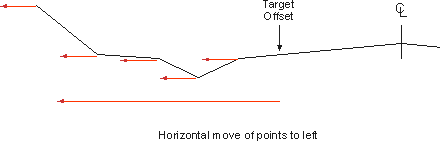
A 'target offset' is identified, from which the movement is based. This is an offset relative to the CL. The points lying either to the left or to the right of this 'target offset' can be moved horizontally, or along the grade of the section at the 'target offset'.
By default, all the points to the left or right of the target offset are moved. However, if the Move within radius of target offset option is selected, you must enter a value for the radius. In this case, only points that fall within this radius of the target offset are moved.
If you move points horizontally, the points are simply shifted to the left or right as shown below.
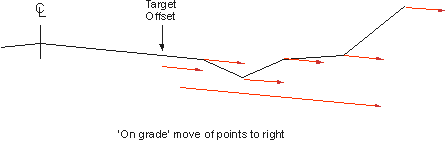
If you move point on a grade, the points are moved at the grade just before the target offset. In the example below, the carriageway grade is used to move the points.
Procedure
Fill in the relevant details and click Next to continue.
Fill in the relevant details and click Finish to continue.
If you selected the Individually option for Enter details for sections in the Process Details, the Expand/Shrink settings display for each chainage in the range, giving you the opportunity to alter the specified details for each chainage.
Click Yes to save the updated cross-section; or No to retain the existing cross-section.