Track a route at a defined constant grade.
|
Icon |
Command |
Shortcut Key |
Toolbar |
|
|
TERRAINISOGRADE |
|
|
This function allows you to track a route at a defined constant grade, in the direction indicated by you. The main uses for this function lie in irrigation, canal, and furrow design, as well as low-cost road route location where constant grades are required. Haul roads and timber extraction routes are typical examples.
You only need to identify a start point and a direction in which to track. The function then hunts a route along a specified slope.
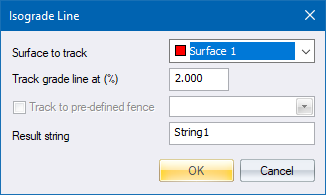
The initial data entry box permits definition of the extraction surface and the slope to track. The line start point can be on a different surface, to allow for separated defining data or points obtained from another source. If the Track to pre-defined fence checkbox is selected, the grade line is constrained to tracking within the boundaries of a particular polygon. If this option is used the Define Fence function under Model has to be completed before the Isograde Line is tracked.
After the data entry box has been completed, you need to select a start point for the grade line. Because at any one spot (unless it is on the edge of the site), there will be two possible directions for a grade to run, you must also provide a starting direction. This direction is approximate and only needs to be within the same quadrant as the required line.
The line is then tracked. Tracking always attempts to take place in the same general direction. In other words, lines don't double back on themselves within the same polygon. This is not to say that a gradual double back, which occurs over several polygons, will not take place.
Although the function attempts to follow a particular direction, this decision is sometimes marginal. Unexpected results are therefore not uncommon in grade line tracking, particularly in rough country. It is a good idea to work on small portions at a time.
The generated grade line points are added to the string. This permits you to isolate, plot or delete the isograde line in the normal way.
Procedure
Fill in the relevant data and click OK.
Isograde: Snap on start point
Click on an existing point in the Design Centre window.
Isograde: Indicate starting direction
Click on a position in the Design Centre window to indicate a first-try direction from the start point.
 Points within the current view are operated on.