Think of a layout as your paper print. You can add various entities to the layout, including a title block, a frame and any text or other drawing entities you want. Most importantly, you can insert your viewports into the layout, at the position and scale you want.
To define a new layout:
Select Layouts ► Insert Layout.
You are prompted to:
Name the layout “Sheet 1” and click OK.
The Layout Settings display.
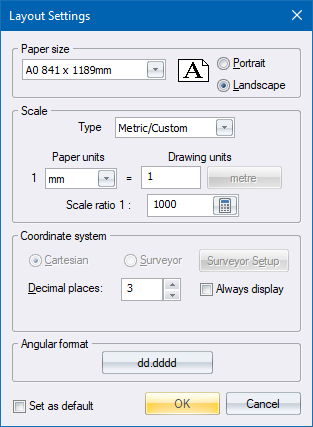
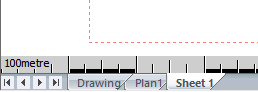
Set up the parameters as above and click OK. A new tab is added to the bottom of the drawing layout called “Sheet 1”.
You are asked if you want to add a default viewport to the new layout.
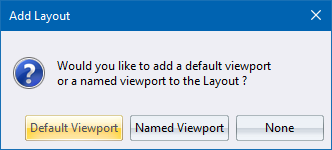
If you select Named Viewport, the program creates the layout and displays the insert viewport options. Select the Plan viewport from the dropdown list and set the scale to 1:100.
Click OK.
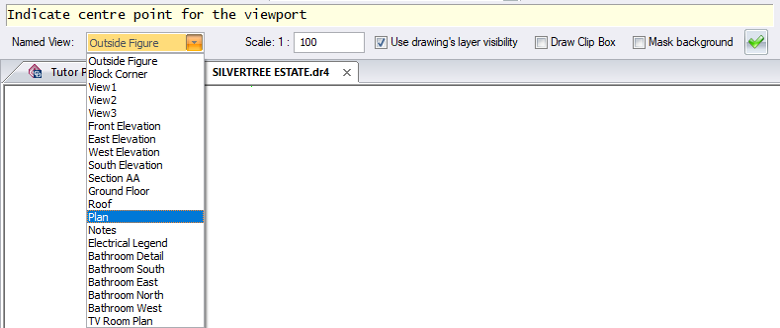
The named viewport is attached to the cursor. Move the cursor to your preferred position for the view and click. The viewport is inserted into the layout at your chosen scale.
You can continue to add viewports as required. When complete, terminate the function by right-clicking and selecting the Quit option; or pressing [Esc].
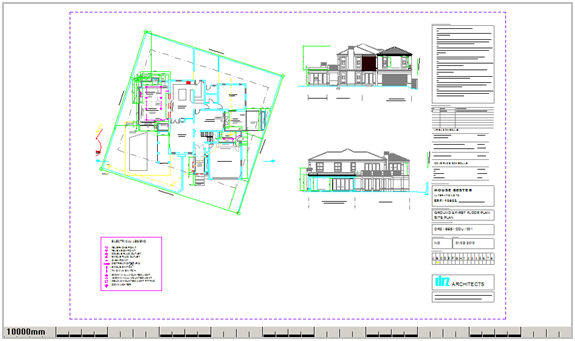
In the example above, the Plan view, front and side elevations and notes are inserted at a scale of 1:100. Now the electrical legend can be inserted at 1:50 as shown below.

The layout now looks like this:
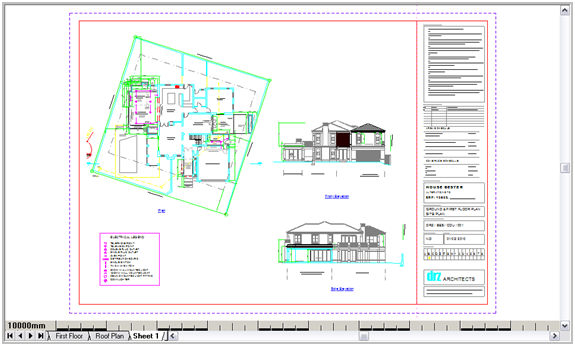
If you want to change the position or clip limits of any viewport, select it and change the clip limits or position using the drag handles. Alternatively, right-click the viewport and select the Properties option.
You can now finish off your layout by adding a frame, title block or any other drawing entities you require.
Once a viewport has been inserted into a layout, you can change the way the viewport is displayed.
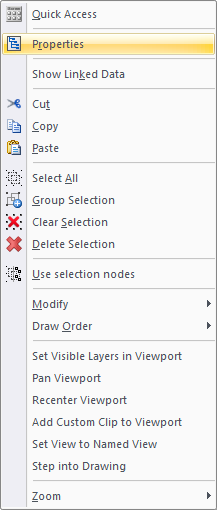
Select the viewport and right-click to display the context menu.
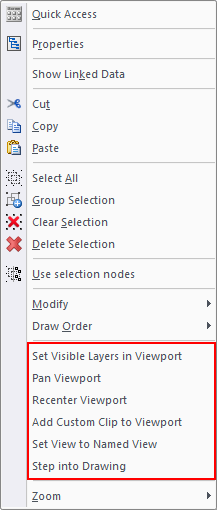
You can change the settings using the Properties option.
|
Menu Option
|
Description |
|
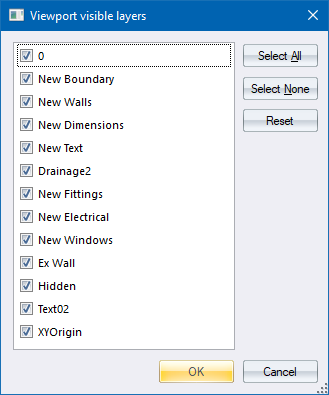
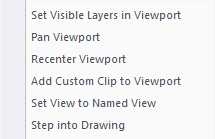
Set Visible Layers in Viewport |
Displays a list of the visible layers in the viewport.
Specify which layers must be displayed. These layer visibility settings are independent of the layer settings of the drawing space. |
|
Pan viewport |
Pan the viewport contents using click and drag. This moves the viewport's contents in the existing viewport limits. |
|
Recenter Viewport |
Define a new centre point for the viewport. The viewport will be updated accordingly. |
|
Add Custom Clip to Viewport |
Apply a custom clip to the viewport by using an existing polygon or circle entity. |
|
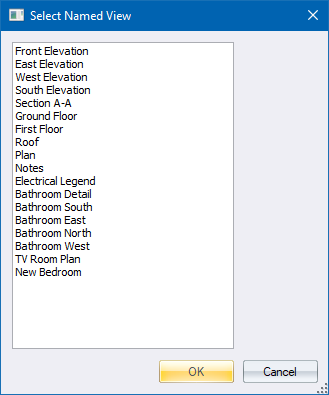
Set View to Named View |
Set the current viewport view to an existing named view. |
|
Step into Drawing |
Step from the layout viewport into the model or drawing space in order to edit the data. |
To change the order of layouts, simply click the layout tab to be moved and drag it to the new position on the list of layouts.