Icon
Command
Shortcut Key
Toolbar
![]()
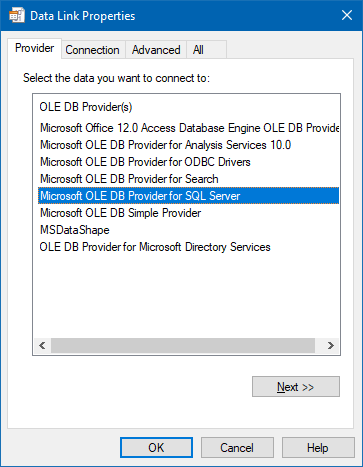
DATALINK
Tools
Link database data to drawing entities.
|
Icon |
Command |
Shortcut Key |
Toolbar |
|
|
DATALINK |
|
Tools |
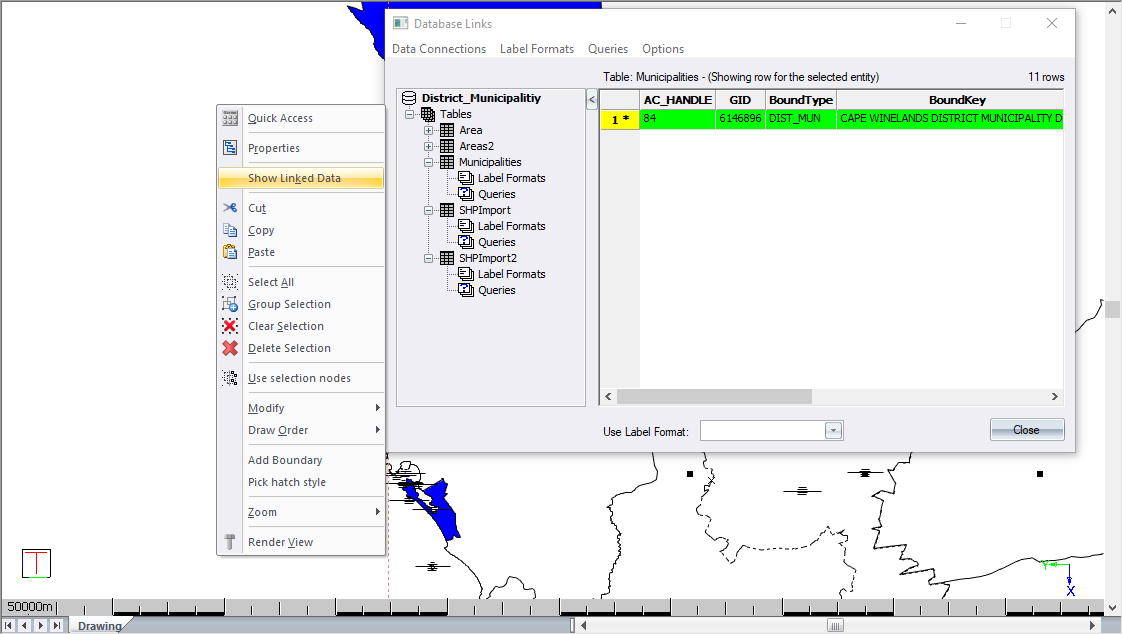
Database linking is a way to use data from external applications. Any record in an external database may be linked to a drawing entity, and a link label showing selected data from the database record can be associated with the linked entity.
 The Database Linking window is "non-modal" so you can continue working on your drawing whilst it is open.
See Also Database Linking Example
Procedure
The database linking workflow consists of a few simple steps:
Open or create a drawing with the entities you want to link.
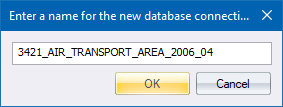
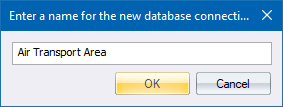
Create a new database connection, specifying the database you want to use.
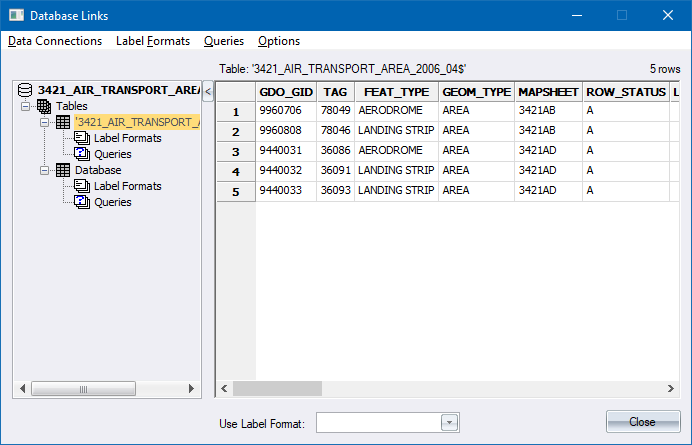
For the database table you want to link to, specify the field/column which is the “unique id” of the data in that table.
Link entities, one by one, to records in the relevant database table.
View the data in the database.
Run a query.
Specify the label format.
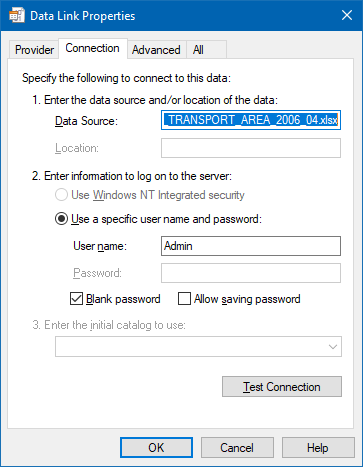
You need to tell the program where to find the database containing the information you want to link to the drawing entities.
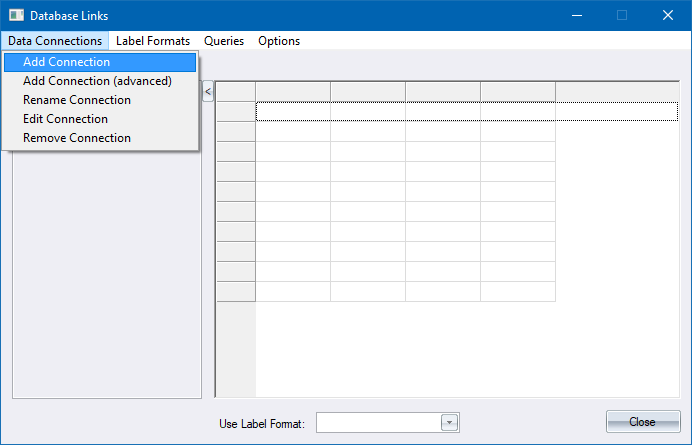
Browse for a database file. This can be an MS Access, MS Excel or any other supported type of database file. Select the database file you want and click Open.
You cannot create multiple connections to the same database.
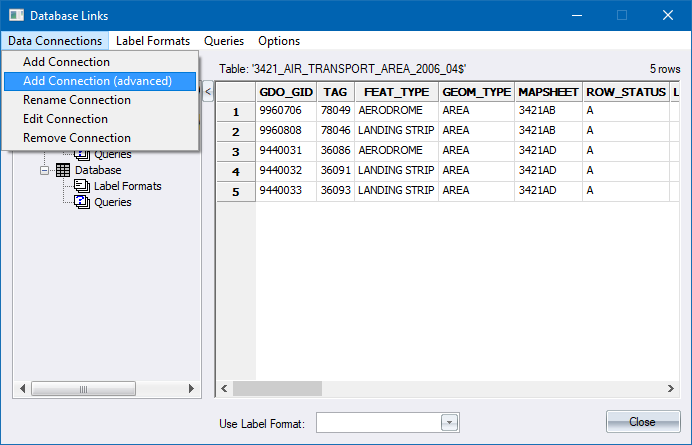
This function uses the Windows OLE DB Data Link settings to allow you to specify/define a database connection.
You may want to edit a database connection if, for example, the location of the database file has changed. In this case, you will get an error message displayed in the connection tree.
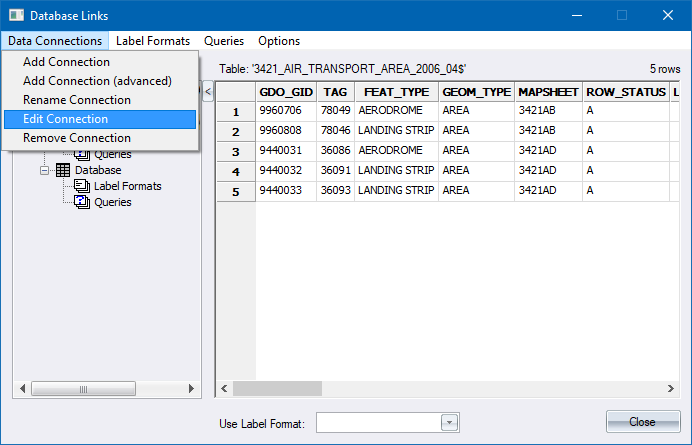
Alternatively, select the connection to edit, right-click and select Edit from the popup menu.
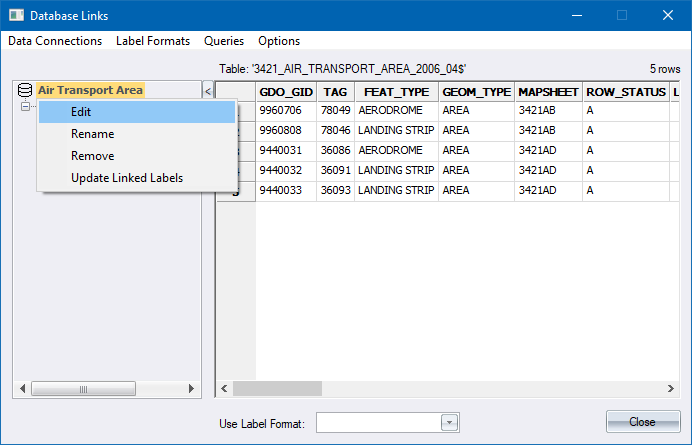
If the database location is specified correctly the list of tables in that connection will be displayed in the connection tree.
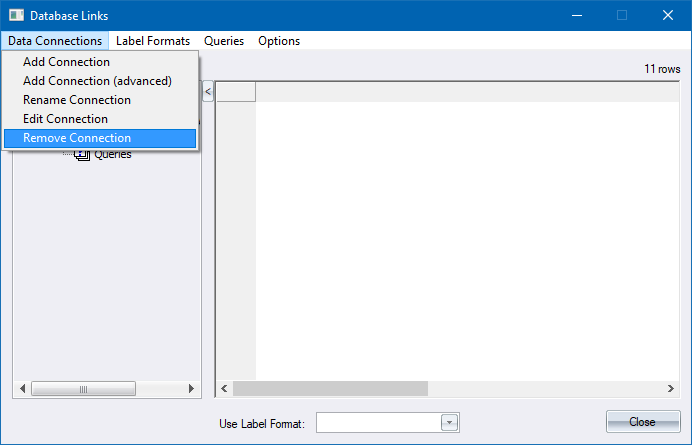
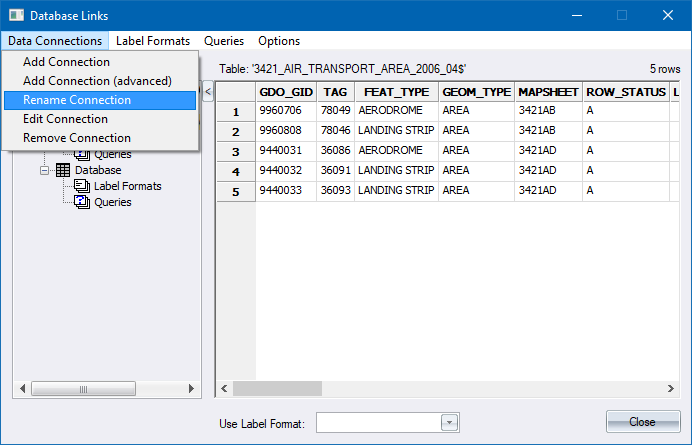
Alternatively, select the connection to remove, right-click and select the Remove option from the popup menu.
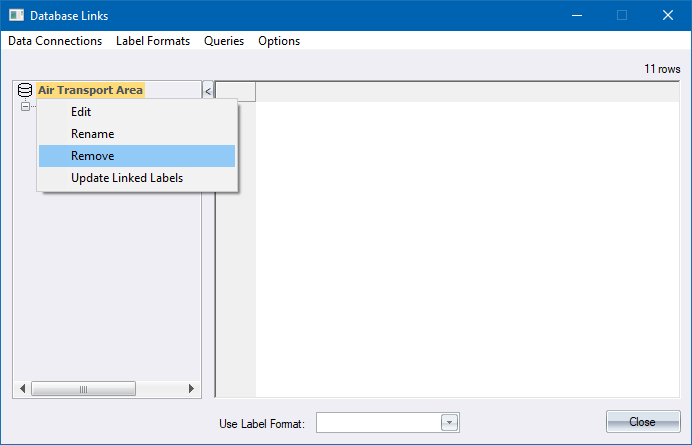
If you remove a connection, any data links belonging to that connection are lost.
How to link rows in database tables to entities in your drawing.
You need to identify the following:
The entity you want to link with your data.
The row of data in a table in a connection that you want to link to your entity.
Once you have this information:
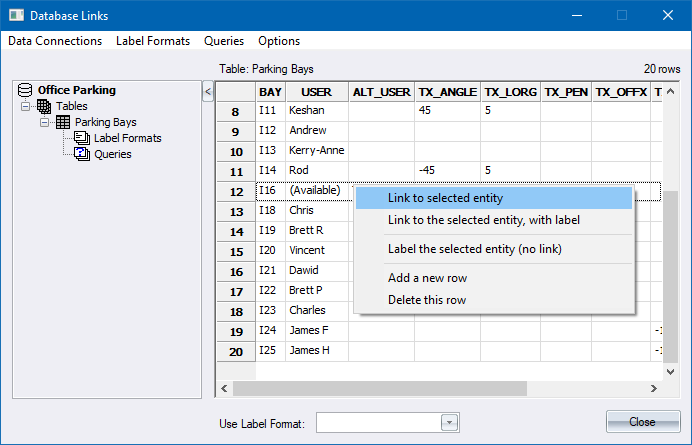
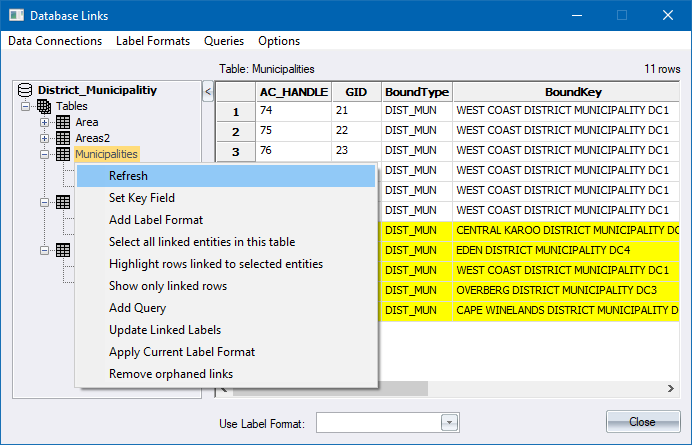
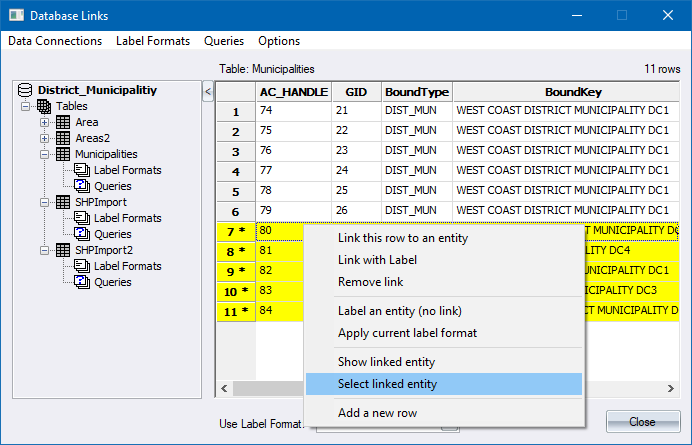
Right-click the relevant row of data and choose the Link this row to an entity option.
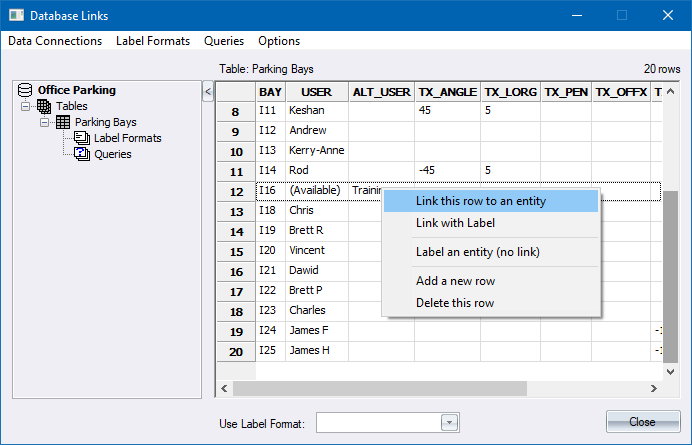
If you have not previously specified the unique identifier, you are prompted to select it from a list of column names.
You are then asked to click on the entity you want to link to in the drawing.
If you already have an entity selected, the menu option will be Link with selected entity. Using this option will link the selected entity to the record.
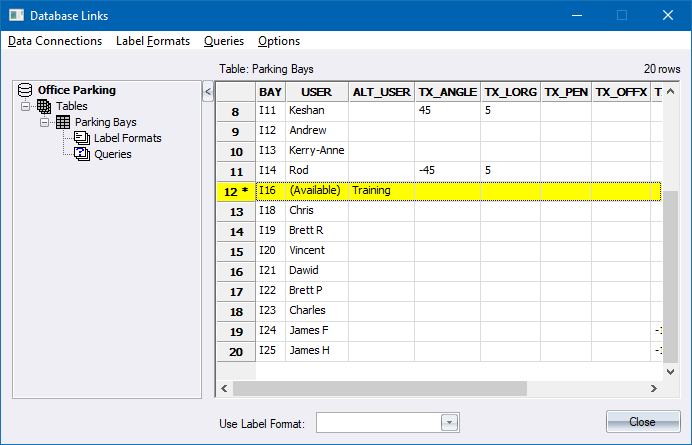
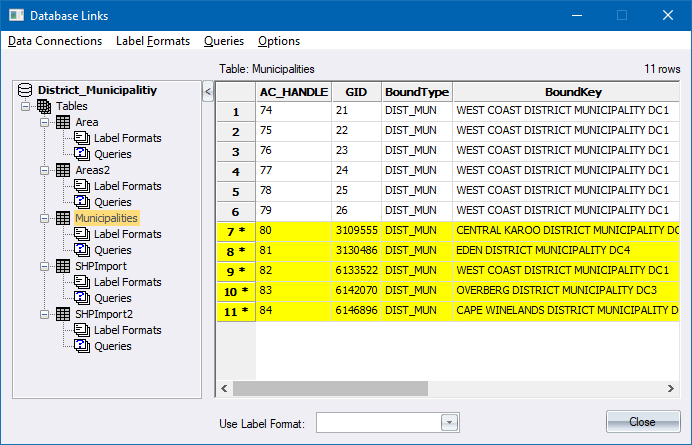
The row of data in the data grid should now be drawn with a yellow background.
A data link can also be created with a text label displaying data from the linked data row. Before creating a label for a link, you need to specify a label format that is used to format the text label created.
To specify a label format:
Right-click on the Label Formats item under the table name and select the Add label format option.
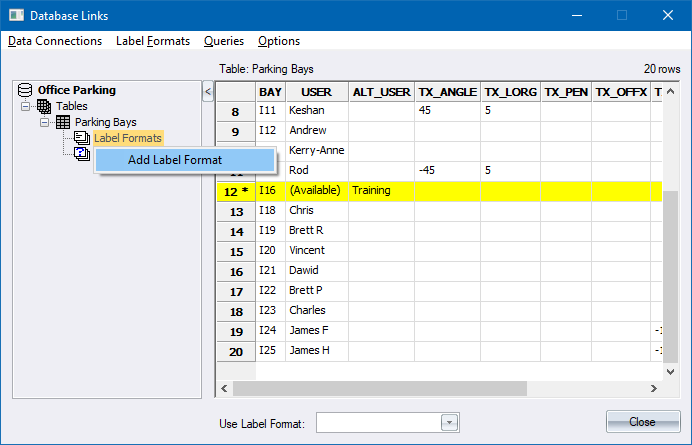
The Label Format Editor displays.
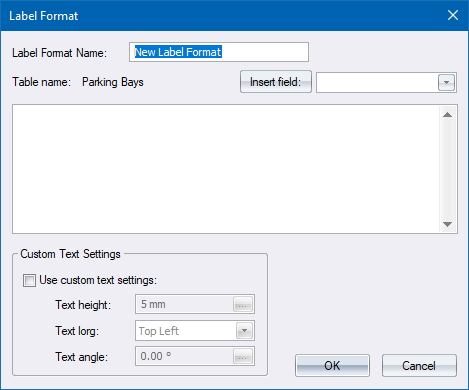
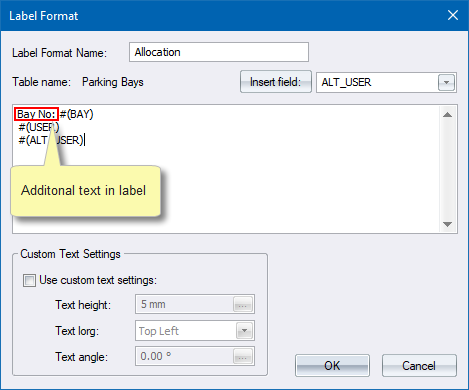
Specify a name for the label format and add at least one column name placeholder to the format text. The format text can also contain other text characters.
Click OK. Now you can proceed to create a link and add a label to the drawing.
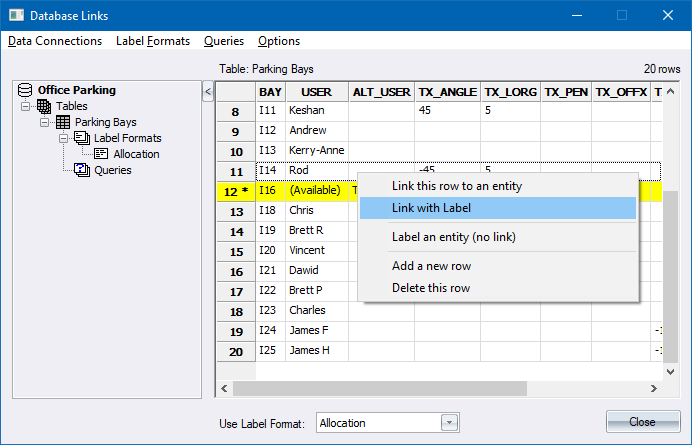
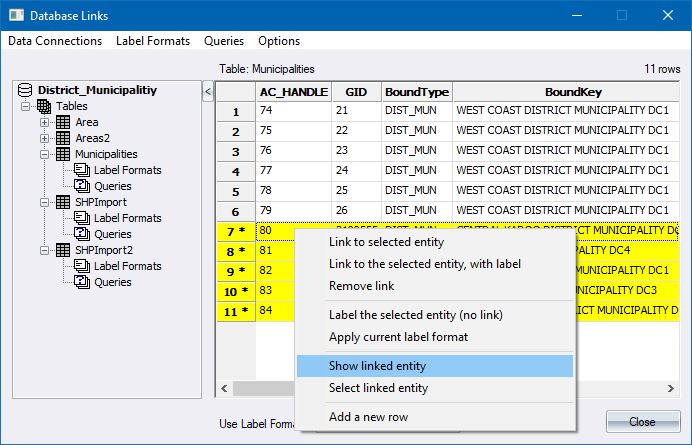
Right-click the relevant row of data and select the Link with label option.
If you have not previously specified the unique identifier, you are prompted to select it from a list of column names.
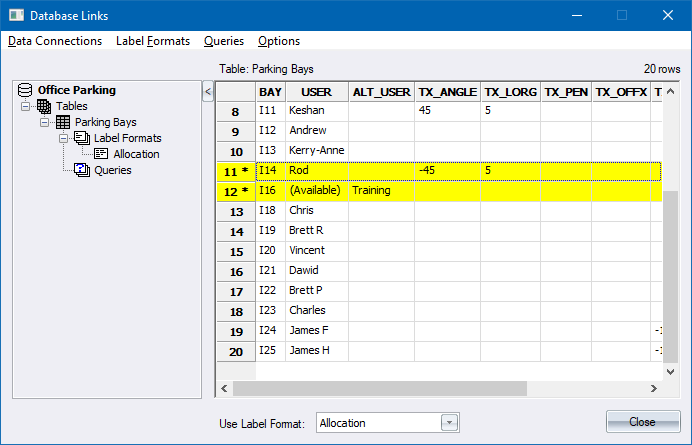
Indicate entity to link (Bay = I16)
Click on the drawing entity that must be linked with the data record.
The link is created. The “data link label” is drawn at the centre position of the linked entity, and the record is highlighted in yellow.
You can create a text label in the drawing, displaying data from a specific data row. You need to specify the label format that is used to format the text label created.

Indicate entity to label (Bay = I18)
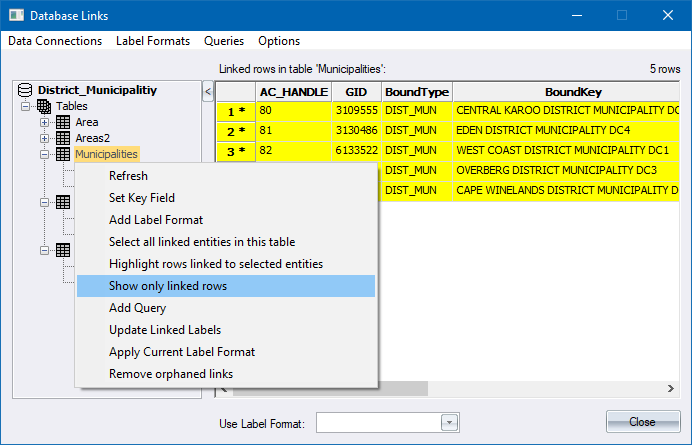
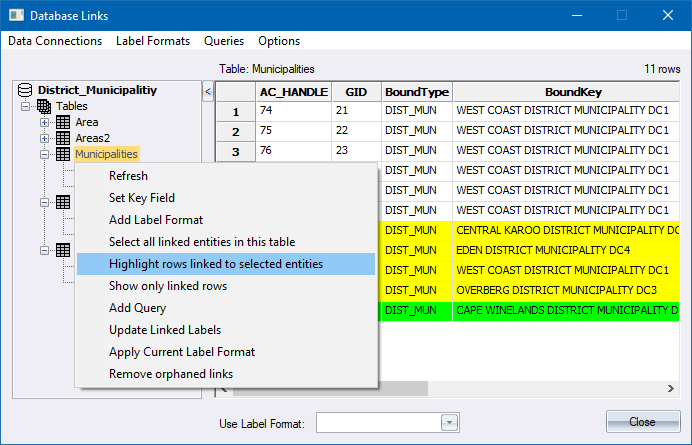
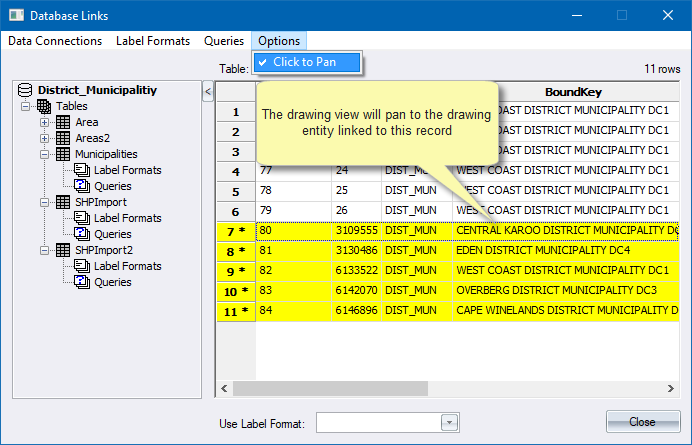
You can edit, update or remove data links and link labels.
|
Option
|
Description |
|
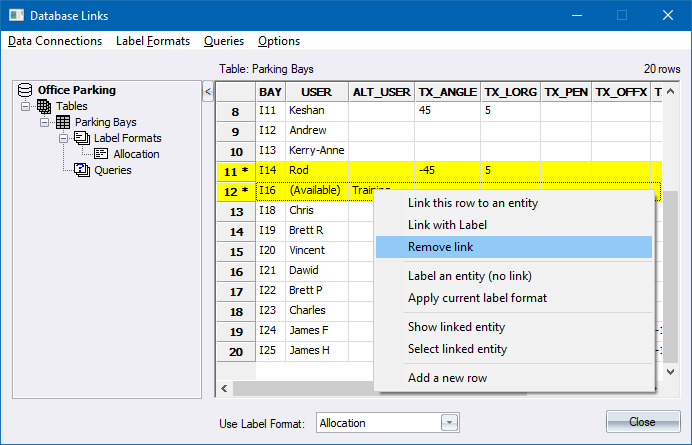
Remove a link |
Right-click on a linked row in the data grid and then select the Remove link option.
You will not be prompted for confirmation. |
|
Update link labels |
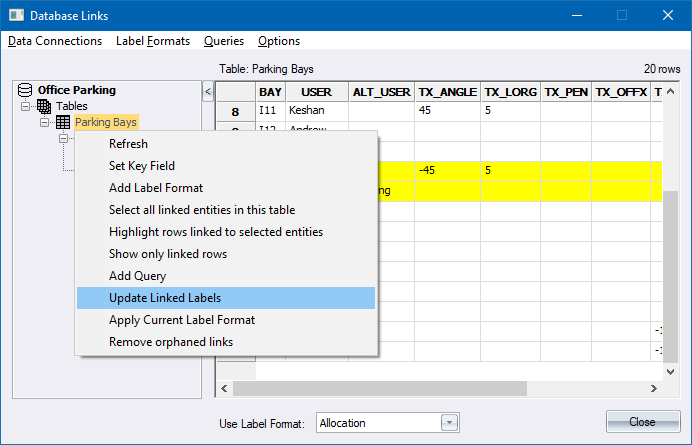
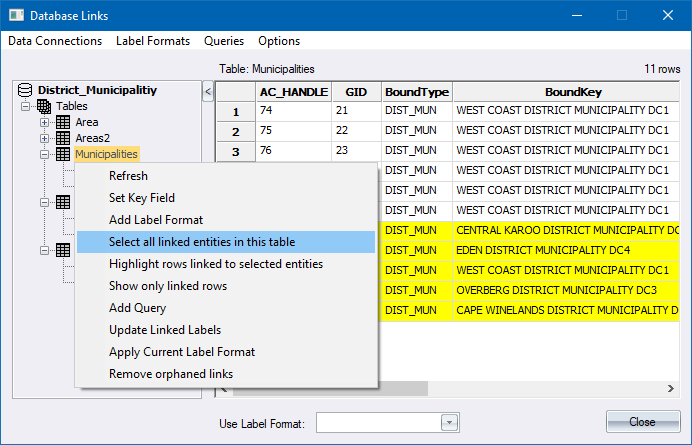
Right-click on table name and select the Update Link Labels option.
Link labels are updated to reflect the latest data in the table. |
|
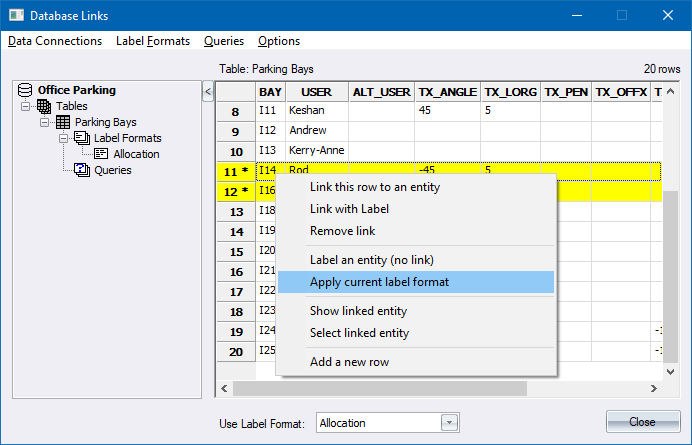
Apply current label format |
You can apply the current label format to a specific linked label by right-clicking on the relevant linked row in the data grid and selecting the Apply current label format option from the popup menu.
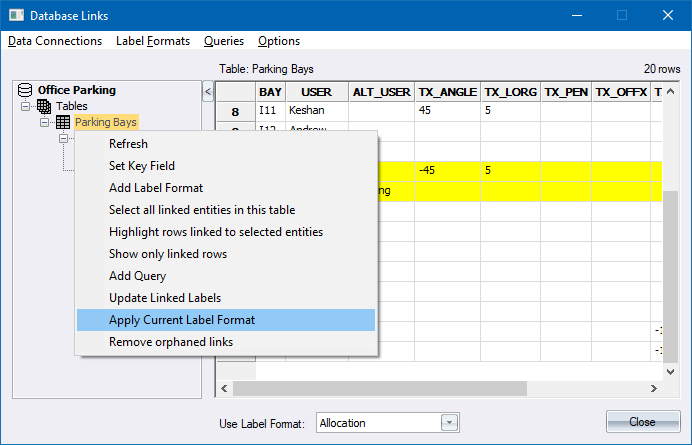
You can apply the current label format to all labels linked to a specific table by right-clicking on the relevant table name in the connection tree and selecting the Apply Current Label Format option from the popup menu.
|
The following rules apply when creating text labels using the database linking functions:
The text labels are formatted using the “current” text style, UNLESS
The text labels have been created using a label format where the text style/height/lorg have been set in the “Label Format” window, OR
The text labels have been created by SHP file import, and the text style/height/lorg values have been set in the additional “TX_HEIGHT”, “TX_LORG” and “TX_STYLE” columns created during import.
A database query allows you to filter the information displayed in the table data grid.
Select the table you want to create a query for in the connection tree.
Right-click on the table name and select Add Query.
The Database Query window appears.
Enter a unique name for the new query, e.g. “EmployeesInSalesDepartment”.
In the filter grid in the window, specify a filter for the query by selecting a field in the table to filter by, and a condition for that field e.g. “Department = Sales”:
Click in the cell just below the “Comparison” header, and select “=” from the dropdown list.
Click in the cell just below the “Value” header, and type in “Sales”.
Click Run Query to test your query. The Database Linking data grid should update to show only the data for the employees in the “Sales” department.
You can specify multiple conditions for the query filter by specifying a field name, comparison operator and value in the second row of the grid, and following rows. The conditions can then be combined by selecting a logical operation (AND or OR) in the first column of the new row.
Navigate to the relevant query node in the connection tree, visible under the “Queries” node which is under a table node.
Right-click on the query name in the connection tree, and select the Run Query option in the popup menu.
Navigate to the relevant query node in the connection tree, visible under the “Queries” node which is under a table node.
Right-click on the query name in the connection tree, and select Edit from the popup menu.
The Database Query dialog will appear, allowing you to change the name of the query, or change the filter conditions, or select which fields/columns in the table will be displayed in the query results.
See Also Database Linking Example