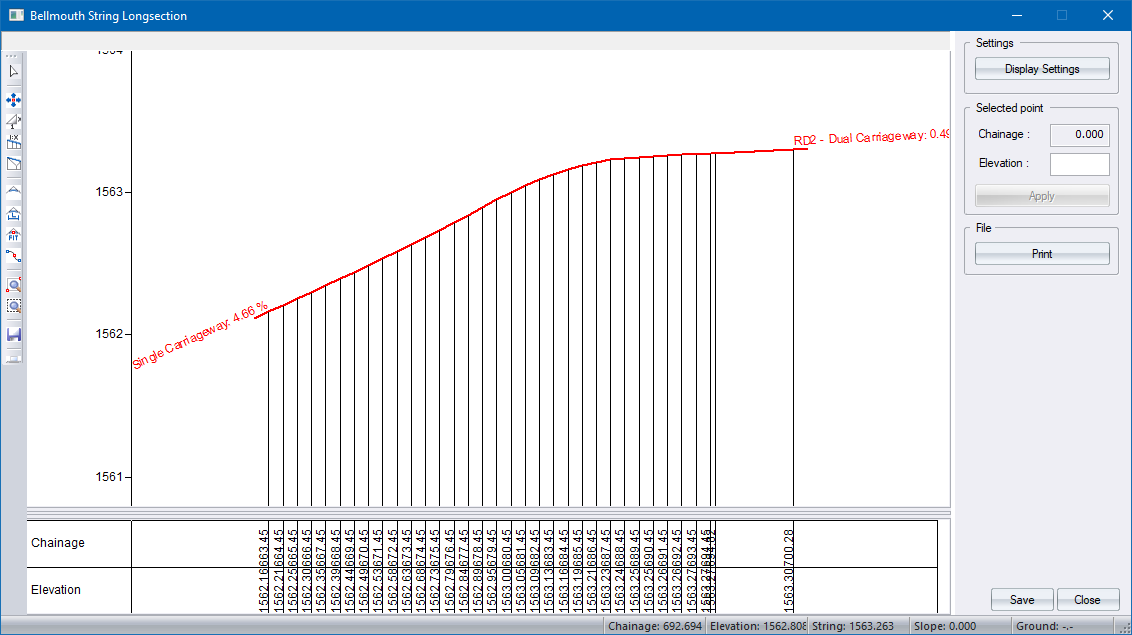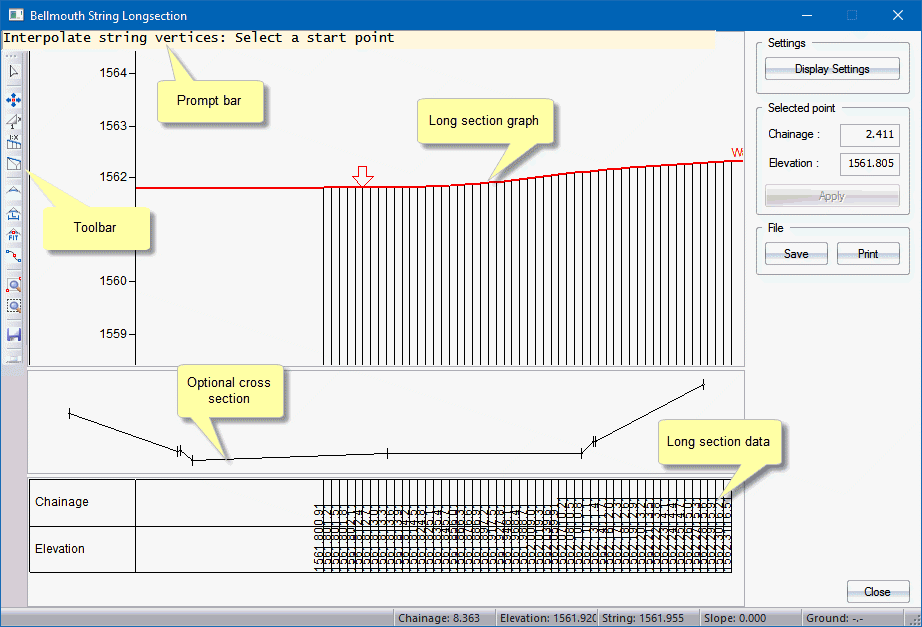
The String Longsection Editor allows you to view and modify existing road and terrace strings. The Editor consists of three viewing panels:
Longsection Graph - Displays the string longsection plus additional strings and ground lines, as determined by the Display Settings.
Cross-Section - Optional. Displays the cross-section at the cursor position on the longsection. Switch on in the Display Settings.
You can zoom in/out of the longsection using the mouse wheel; or the Zoom Window icon on the toolbar.
The Status Bar at the bottom of the window displays the chainage, elevation and slope of the string, as well as the elevation of the ground at the cursor position.
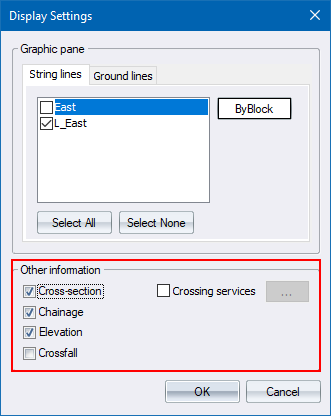
This displays the string Display Settings, which determine which information is displayed in the longsection graph, optional cross-section graph and data area. You can select from other strings in the data set, ground lines extracted from the DTM, as well as what information to display in the data area.
Specify which information must be displayed in the data area, as well as the optional cross-section display.
You can change the elevation of individual vertex points as well as fit points along a grade, between two other vertices, along a curve through three points, or a curve of the specified radius.
Icon
|
Description
|
|
Select a single vertex. |
|
Move a single vertex. |
|
Vertical exaggeration factor. |
|
Interpolate a range of vertices between two points. |
|
Apply a grade to a range of vertices. |
|
Smooth a range of vertices by a vertical curve. |
|
Change a range of vertices to lie on a vertical curve with a specified curve length. |
|
Change a range of vertices to lie on a vertical curve that runs through a specified point. |
|
Apply a spline through a point. |
|
Zoom in to a user-defined window. |
|
Redraw. |
|
Save the current changes. |
|
Send the views to a printer. |
You will be prompted in the prompt area when required. Click Save to save your changes to the string.
Click Print to print the longsection.
Move string vertex: Select a point
Click on a vertex.
Move string vertex: Indicate a new position
Drag the vertex to it's new position and click. Because you're editing the vertical alignment, it is only the elevation that is important and considered at all. The change will be reflected on the longsection view.
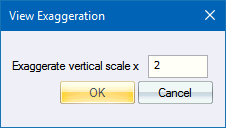
Enter the number at which you want the vertical extent to be a scaled-up factor of the horizontal scale.
Click OK.
You are prompted to:
Interpolate string vertices: Select a start point
Click on the first vertex at the start of the range to be graded between the two points.
You are prompted to:
Interpolate string vertices: Select an ending point
Click on the second point that will determine the range to be graded. All the vertices between the two points will be graded on a straight line between the first and second points.
Grade string vertices: Select a start point
Click at the beginning of the range. This vertex will remain the same but is needed to indicate the starting position.
Grade string vertices: Select an ending point
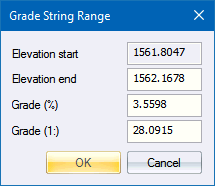
You can specify either the elevation at the end point, or the grade between the start and end points as a percentage or ratio slope.
Vertical Smooth: Indicate start vertex of curve
Click at the beginning of the range. This vertex will remain the same but is needed to indicate the starting position.
Vertical Smooth: Indicate end vertex of curve
Vertical Smooth: Indicate start vertex of curve
Click at the beginning of the range. This vertex will remain the same but is needed to indicate the starting position.
Vertical Smooth: Indicate end vertex of curve

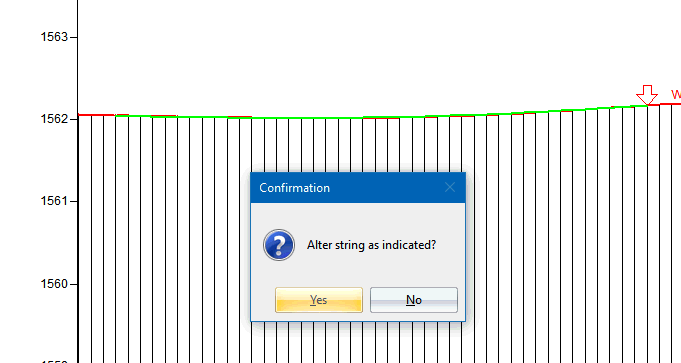
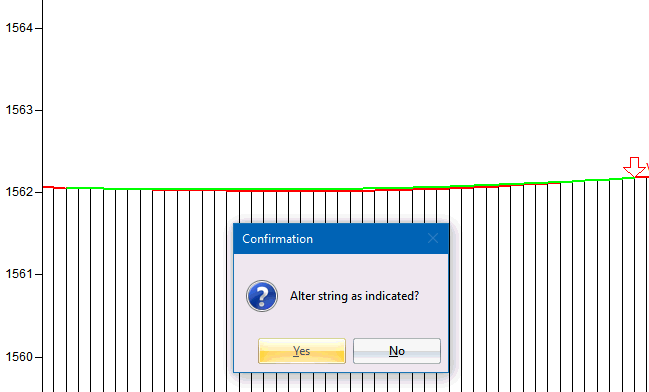
Click Yes to confirm that the string can be altered as displayed. The string vertices will be updated to lie on a parabolic, vertical curve with the specified curve length. The change will be reflected on the longsection view.
Vertical Smooth: Indicate start vertex of curve
Click at the beginning of the range. This vertex remains the same but is needed to indicate the starting position.
Vertical Smooth: Indicate end vertex of curve
Click at the end of the range.
Vertical Smooth: Indicate a point on the curve
Click on a point that the desired curve must pass through.
Use this option to fit a spline. You are required to indicate two edges and a through point.
Indicate start vertex of spline
Indicate end vertex of spline
Indicate a point on the spline